How to reset a Huawei tablet to factory settings? To understand the question posed, just look at the device menu and find the desired section, but there are other solutions:
- using the Recovery menu to roll back the system to its original level;
- introduction of a special command that rolls back the tablet to its starting state;
- system recovery using a combination of buttons.
At the same time, people who want to restore the basic parameters of the device need to remember that as a result, all data stored in it is deleted from the device’s memory. That is, after the operation is completed, contacts, chat history, applications, user files, including photos, videos and music will disappear forever. To avoid such losses, it is recommended to save the necessary data in advance in external storage: in the cloud or on removable media.
How to use a smartphone: tips for beginners - znaykak.ru
This article is intended for those users who picked up a smart phone for the first time. Modern smartphones have long ceased to perform only the simplest functions of providing voice communication and exchanging SMS messages. Today, these devices have become reliable and faithful assistants to a person in everyday life. Find out the latest news - no problem, contact friends and acquaintances who are located anywhere in the world - no questions asked. Moreover, if previously you had to pay for an expensive international call, today, thanks to various instant messengers, you can organize a video conference only if you have an Internet connection. And it doesn’t matter at all where your interlocutor is if he also has a modern gadget with a connection to the World Wide Web.
But this is not all that can be done using a smartphone. Calculate the optimal route for a car trip or bike ride, keep track of your physical activity, calorie consumption/burning, assist in planning a family budget, find new friends and even a soulmate - all this is possible with a small smart device. But for your smartphone to become truly smart and useful, you need to configure it correctly. And our short instructions will give you the basics of how to use a smartphone as a beginner.
Installing applications
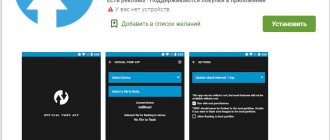
It is better to download programs from Google Market. The utilities on this service are virus-free. If you install an application from a third-party source, you can damage your gadget.
To find the program you need, enter a keyword into the search. Then click on any of the proposed ones and download. The download should start immediately. If this does not happen, it means there is not enough space on the device.
Setting up the tablet in this way is required not only on a new device, but also after resetting it to factory settings.
Subscribe to TechnoCouncil on social networks so you don’t miss anything:
Google play
First of all, let me remind you once again that you need a Google account to access Google Play. Information about him was at the beginning of the article. The icon of the store itself is always located on the central desktop of the smartphone - this is one of Google’s requirements that all manufacturers are forced to follow.
At the top of the screen there is a search bar; if you are looking for a specific application, you can immediately enter its name there. Just below are buttons leading to the main sections of the Google store: applications, games, movies, music, books and magazines.
Some sections of the store do not yet work in all countries, but games and applications are available to absolutely everyone. Next is a list of interesting new movies, various selections of applications, tips from the built-in recommendation service, and other similar information.
We are primarily interested in the games and programs sections. First of all, it is worth noting that applications are both paid and free. When purchasing free applications, everything is clear - just click on the “Download” button and then check the list of permissions that the application requires to work.
As for paid applications, first you will be asked to choose a payment method. This is either a credit card or your cell phone account. True, not all mobile operators support the latter option yet, but there’s nothing you can do about it.
Sections of programs and games consist of several screens, switching between which is carried out using a horizontal swipe. The home screen displays recommendations from friends and advice from Google Play editors. The left screen is dedicated to a list of categories, with which you can quickly get to the desired subsection.
To the right of the main screen there are screens with lists of the most popular paid and free applications. If you don’t know what exactly to install on your new smartphone, be sure to look there.
Unfortunately, popularity is a fickle thing. And, in theory, it’s also quite possible to increase the rating. And sometimes some very strange applications that are of interest only to a very narrow audience get into the “Top”. But time-tested programs, which almost everyone has already installed, sometimes disappear from the “Top”, because the number of new downloads of them is not so large.
That is why for new Android users we have prepared a selection of the highest quality, in our opinion, applications of all categories.
Language setting
It’s good if you purchased a tablet in a store and it already has Russian installed as the default system language, then everything is intuitive for the user. If you purchased a tablet abroad and it came with an interface, for example, in German, then problems may arise. Now we will figure out how to set the language on an Android tablet.
We need to open the settings, we can do this in several ways:
- very often the manufacturer places a button in the form of a gear on the main object panel;
- You can open the “curtain” by swiping your finger down from the top edge of the screen, the settings icon will be exactly there.
In the settings menu, we need to move down a little to find the line with the icon on which the letter “A” will be depicted. We don't specify the string name because it doesn't matter if we're in a language we don't understand. We click on this item and in the tab that opens, click on the very first line - we are offered a list of languages. We choose the language that interests us, in this case Russian. The interface has become clear and is now ready for use.
How to add or change language when typing text messages
We go into personal messages and create a new one, a keyboard with the Russian language opens. But it happens that you need to use 2 or 3 languages at once in addition to the main one. How to do it? In most cases, there is a button right on the keyboard with which we can quickly get to the desired settings section.
Find the button you need right on your tablet keyboard
If there is no such button, then go to the general settings and go to the same section in which we changed the system language, now it is called “Language and input”. We are looking for our keyboard, in most cases it will be called “Android Keyboard (AOSP)”, click on the additional settings button and see a small window. Here we can select which language will be used by default when typing, and go to another window where we can select and configure a standard or custom keyboard (downloaded from the Play Market). We use a standard keyboard, so we click on the additional settings button for this line and get to the menu where the “Input languages” item will allow us to add as many languages as we want, between which we can switch when entering a message.
Lenovo tab 3 essential 710l 8gb
General characteristics:
- diagonal 7 inches;
- built-in memory 8 GB;
- support for memory cards up to 32 GB;
- OS Android 5.1;
- RAM - 1 GB;
- 4-core MediaTek MT8321 processor;
- Wi-Fi, Bluetooth, 3G, GPS;
- SIM card support;
- main camera - 2 MP;
- front camera – 0.3 MPix;
- battery - 3450 rubles.
Pros according to user reviews - constant firmware updates from the manufacturer, fast operation, battery life lasts a long time, support for 2 SIM cards.
The disadvantages include the creaking of the case, low sensitivity of the display, and not very loud sound.
Cost - 4199 rubles.
Lenovo TAB 3 Essential 710L 8Gb
Main parameters:
- 7-inch display;
- built-in memory 16 GB, microSDXC slot, support for memory cards up to 128 GB;
- Android 7.0;
- RAM - 1 GB;
- 4-core processor Spreadtrum SC7731G 1300 MHz;
- Wi-Fi, 3G;
- main camera - 2 MP;
- front camera - 2 MP;
- battery - 4100 mAh.
Advantages: lightweight and convenient, high-quality assembly, holds a charge well.
Disadvantages - it slows down when running several applications at the same time, weak camera, slow mobile Internet.
Price - 5765 rubles.
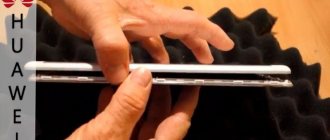
HUAWEI MediaPad T3 7.0 16Gb 3G
In the video about getting started with the tablet
Opera Mini browser.
An excellent “fast” browser that should be installed immediately after setting up a Wi-Fi network. We recommend using only this browser, since it has a number of advantages compared to standard browsers on Android 4. The main advantage of Opera Mini is the speed of loading pages, a pleasant interface and, of course, convenient operation. You can also save pages as bookmarks, and later the saved pages can be viewed without connecting to the Internet. The Opera Mini browser can be downloaded from Play-Market absolutely free. There are many versions and from them we would like to highlight “Yandex Opera Mini”.
Turn on the device, log into your account and establish a connection to the Internet
Following the instructions, we turn on our smartphone or tablet, after which the system desktop will appear in front of you, or, if the device is turned on for the first time, the initial setup wizard will start. For example, on a smartphone the wizard suggests doing the following:
- Select interface language.
- Connect to the Internet via Wi-Fi - if you don't have a network nearby, you can skip this step. Why does this menu appear the first time you turn it on? Due to the fact that most programs are designed to be used with a working Internet connection. This does not mean at all that a phone or tablet is useless without the Internet; this step was created rather for convenience - they say, connect to it immediately, so as not to worry about it later.
- Next, the system wizard will prompt you to log into your Google account or create one if you have not yet acquired an account. We highly recommend that you create an account for yourself, because the Android system itself is strongly tied to Google services. Without it, you won't be able to access the app store and won't be able to use email. In addition, creating an account is not difficult, but it will always be with you on all devices where you want, which is quite convenient.
- In the next menu you need to confirm the time and date, which are almost always determined automatically, or enter them manually.
- In the last window you will see items related to determining your location - it is better not to turn them off so that all services work correctly and the smartphone correctly determines the time and date.
Setting up a Google account
Android is a product of Google, so to unlock the full potential of your device, you'll need to create an account. For the average user, the main advantage will be access to the Play Market, so let’s figure out how to set up the Play Market on an Android tablet.
Again we go to the settings and look for the “Accounts” section, in it we need the “Add account” line, where we can select a Google account and gain access to the Play Market. So, we create a new account by filling out all the required fields.
IMPORTANT! Don't lose your account data!
Now we can go to the Play Market, you can find it among other pre-installed applications. Sometimes all Google applications are placed in the sector of the same name. It looks like a regular shortcut - by clicking on it, you can find the Play Market. So, we are inside, what are they offering us? Various applications and utilities for our device, games of various genres, office programs - all this can be downloaded or purchased. Installing any application is not at all difficult; we use the built-in search to find what you need. When we click on the preview of any program, we are taken to a page where all the necessary information on the product is indicated: number of downloads, average rating, genre. Below is a whole block with comments from real users. The big Install button is what we need, we just click and wait for the application to download and install.
Protection against accidental purchases
Google Play also has one more disadvantage. Or rather, not so much from Google Play itself, but from modern games and applications distributed under the Free-to-Play scheme. The vast majority of them have an in-game purchase system, which can be a very unpleasant surprise.
Many parents let their children play games on their smartphone from time to time. And, of course, they don’t expect any trick at all at this moment. In fact, what can a small child do while playing some “Swampy the Crocodile”, Cut The Rope or Angry Birds? Especially when sitting next to your parents?
Unfortunately, many people underestimate the speed with which modern children understand new technology. Having quickly mastered the controls and completed a couple of levels, the child may become interested in colorful icons that offer access to new fairy-tale characters or beautiful objects.
Separately, I note that the fact that the game is in the “Free Games” section does not at all guarantee the absence of in-game purchases. Quite the contrary – the creators of most free games love to force a variety of paid content on users.
This includes the purchase of in-game currency, and special items, and special bonuses, and new heroes, and access to secret missions... In some games you have to pay even just to go through several levels in a row. And you will be constantly reminded of all these opportunities during the game, using colorful banners and thoughtful tooltips.
More about Huawei: How to set time and date on Huawei/Honor phones: step-by-step installation
It is very easy to distinguish “shareware” games from “completely free” ones. If a game allows for in-game purchases, this will be clearly stated on its Google Play page. The corresponding inscription is located next to the “Install” button. The game will require similar permission during installation.
To solve the problem of random purchases once and for all, you should set a password on them. This is very easy to do. First of all, you need to open the Google Play application store. Usually its icon is located right on the main screen of the smartphone.
Then open the side menu. You can do this by clicking on the icon in the upper left corner of the screen or simply swiping your finger from the left edge of the screen to the right.
Now all that remains is to go to the settings section and click on the line “Require a password upon purchase.” On most devices, the default option is “Ask every 30 minutes.” In this case, you will only need to enter your password once every half hour, and all other purchases in this interval can be made without additional confirmation.
I hope that these instructions will allow you to avoid annoying misunderstandings that have a negative impact on the condition of your wallet.
Installing the necessary programs
Installing the necessary applications is also considered the process of initially setting up the device. Here you need to rely on your needs.
Most users download popular social programs (VKontakte, Facebook, Instagram, Odnoklassniki), instant messengers (WhatsApp, Viber, Telegram) and entertainment software (Tik Tok, YouTube).
All applications are downloaded and installed through official stores: App Store for iPad, Play Market for Android, Windows Store for Windows. The principle of their operation is the same, so there will be no problems with how to set up the tablet.
Wallpapers, widgets, icons
But let's get back to the desktop. As I already said, Android can have several of them, and this is done for a reason. After all, the desktop can contain not only application icons, which do not take up much space, but also voluminous widgets.
Widgets are not only beautiful, but also very useful. They allow you to immediately display all the information you need, without forcing you to launch the corresponding application each time. This could be a clock widget, a weather widget, a widget with sticky notes for notes or purchases, a widget with a list of letters or photos of contacts, a widget with basic switches and much, much more.
For a long time, widgets have been the hallmark of Android. During the existence of this OS, thousands of different widgets of all colors and sizes have been created. Most of them can work on any firmware or proprietary shell, but there are also some that cannot be installed on “non-native” smartphones.
In addition, we should not forget about the aesthetic side of the issue. Not everyone likes it when their desktop is completely cluttered with widgets and icons that make it difficult to see the beautiful wallpaper. This is not a problem on Android - create an additional desktop and move the icons that are bothering you there.
You can change the wallpaper or add a new widget to your desktop using the desktop editing mode. It is activated on different smartphones slightly differently. Basically, you either need to make a long tap on an empty space on the screen, or perform a “pinch” on any desktop.
In general, customizing the appearance and convenient organization of the workspace is one of the strengths of the Android OS. A whole series of articles on our blog is devoted to this issue; you can read them by clicking on the banner below.
Here I will only focus on setting my own ringtone. The fact is that in Android smartphones this point is often not implemented very clearly and raises questions among new users.
How to create a folder
Why might you need to create a folder on your desktop? Suppose we have downloaded a lot of games, and they occupy several tablet screens. Finding any application becomes a problem. To somehow organize the desktop, let's create a folder and place all our games in it. To do this, tap on the icon of any game and move it to another icon.
Create folders. Step 1
“Android” will automatically create a folder containing two icons of these programs
Creating a folder. Step 2
The folder is still untitled
Creating a folder. Step 3
Tap on it, it will open, tap again on the inscription “Untitled folder” - the keyboard will appear, and we can write the name of the folder
Creating a folder. Step 4
Drag the remaining icons to the same folder. They end up inside the folder, freeing up the desktop.
Another way to create a folder anywhere. Tap on the “Files” or “Manage Files” icon. It may be called differently in different versions of Android OS. We go to where we want to create a new folder. Depending on the version of the OS or launcher (the shell for Android that changes its appearance), click on either three dots, an additional menu appears, where there is an item “Create folder”
New folder. Option 2
Another option + “New folder”
New folder. Option 4
– click and create a new folder.
Transferring contacts from an old device
At this point, the initial setup of the smartphone is completed and you can use it. The only question is how to transfer contacts from your previous phone to it.
If this is not your first Android smartphone, then all contacts are most likely already stored in the Google cloud service. Unless, of course, you disabled their synchronization on your old smartphone.
You can check whether your contacts are saved in Google directly from your computer. To do this, go to Gmail and select “Contacts” in the upper left corner.
If you are “moving” from a smartphone running on some other platform, then you can transfer contacts in two ways. The first way is to write them to a SIM card. A few years ago, most people used it and it suited everyone.
But today this method is already noticeably outdated. Firstly, it is far from a fact that your old phone and your new Android smartphone have the same SIM card format. For example, the old device could use a standard miniSIM card, while the new one could use its micro- or even nano-analog.
The second way is to export contacts from your old phone as vCard (.*vcf files). This method supports most models on the market, although there are still annoying exceptions. Next, the *vcf file can be written to a microSD card or transferred to a smartphone in any other way. For example, using mail.
To import vCard contacts into a new smartphone, you need to open its address book, click on the “Menu” button, go to the “Contact Management” section and select “Export and Import”. From here you can either save contacts to a memory card or restore them from a backup.
You will learn more about backing up and transferring personal data (contacts, photos, SMS) to a new smartphone from the seventeenth issue of our column.
What to do first
When the tablet is turned on and the desktop (various programs and icons in the background) is visible, you first need to follow some instructions.
All of them relate to the settings of your mobile device, and if you follow these steps after turning it on, subsequent operation of the device will be easier and more convenient.
SIM card installation
Important! To become familiar with the tablet's operation, you should start by reading the device's user manual. The manufacturer clearly shows where the main connection ports, SIM slot and memory card slot are located. The user manuals for every tablet, from the simple Dexp to the smart Samsung, will tell you how to connect the battery and enlighten you on other steps needed to keep the device running smoothly.
Using the tablet in most cases does not require replacing the SIM card while the device is turned on. The device must be turned off before inserting or removing a card. Therefore, if your tablet can be used in phone mode, or your Internet connection is supported by your mobile operator's network, you should
- Insert the tray into place and lock it by pressing down.
- Read the user manual and find the SIM card slot on the case;
- Pull out the tray and install the SIM card;
- Open the tray (if necessary) using a special paper clip;
- Make sure the device is turned off or turn it off;
The SIM card installation procedure may vary depending on your tablet model. In most cases, the mobile operator card tray is removable; sometimes, when using a tablet, you need to remove the rubber cover that protects the SIM port.
In the simplest models, the card is simply inserted into the slot; in this case, it must be pressed until it clearly clicks; all the information the user needs to install the SIM card is always given in the tablet’s manual.
Language
The language of the system is very important because if you choose the wrong language, it will not be understood. If, after turning on the device, the language is not Russian, it is better to ask someone experienced in using gadgets to make the settings and set the language to Russian.
Instructions for changing the language:
- Go to settings.
- Find the “Language and input” section, if it is not there, select “Advanced settings” and find this section there.
- Go to the Language or Languages tab.
- Select the desired language from the list of languages.
Important! The name of each language is written in its native language.
date and time
The date and time parameter is important not only for informing people, but also for many internal processes of the device. Therefore, incorrect date and time may prevent synchronization, downloading updates, and launching applications.
How to set the date and time:
- Open Settings.
- Find the “Date and Time” section, if it is not there, select the “Advanced Settings” section and find what you need there.
- On the Date tab, select a date.
- On the Time tab, select a time.
If your tablet is already connected to a working mobile network via a SIM card or connected to the Internet via Wi-Fi, it is better to activate the “Use network time” and “Use network time zone” options.
Display
Using your Android tablet is much more enjoyable if you adjust the brightness and colors of the display to your liking. One reason for this is to save battery power. A display that is too bright will quickly drain the battery, and the tablet will have to be recharged.
Changing the display settings is carried out in the Display Settings menu, here you can adjust the backlight brightness, screen resolution, advanced models allow you to change the color temperature (adjusts shades), saturation, and select one of the standard color schemes.
The most useful option in modern tablets is automatic brightness control; the mode is activated by the corresponding switch in the settings; the brightness will automatically adjust to readings from an external light sensor. The screen will reach maximum brightness on a bright sunny day, but at night in a dark room it will almost go dark. It is designed for eye comfort and helps extend battery life per charge.
Safety
In this menu item, you set a password to unlock the tablet; if you wish, you can use a pattern key.
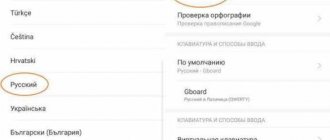
Data backup and recovery
Backing up data to a microSD card
- Not all devices support microSD cards.
- How this function works may differ depending on the operator used.
Back up your data on a microSD card so you don't lose important files.
1 Open the Backups application.
2 Select Backup > SD card > Next.
3 Select the data you want to back up and click Backup.
Enter your backup password in the provided field. No password is required to back up photos, audio, video, and documents.
- Set up a password hint that will help you remember your password if you forget it.
- By default, backup files are saved in the HuaweiBackup folder in the Files application.
Backing up data to your phone's internal memory
Save a backup copy of your data to your phone's internal memory to avoid losing important files. You can back up only small files.
1 Open the Backups application.
2 Tap Back up > Internal storage > Next.
3 Select the data you want to back up and click Backup.
Enter your backup password in the provided field. No password is required to back up photos, audio, video, and documents.
- Set up a password hint that will help you recover your password if you forget it.
- By default, backup files are saved in the HuaweiBackup folder in the Files application.
Backing up data to a USB drive
Use a USB OTG cable to connect your device to a USB storage device and save backup files on it. This way you can connect a USB flash drive, a memory card reader (card reader), or a device with a microSD card installed in it.
1 Open the Backups application.
2 Click Back up > USB storage > Next.
3 Select the data you want to back up and click Backup.
Turning on the tablet for the first time
To turn on your tablet for the first time, press the button on the side of the device. When the tablet is turned on, the screen is locked with the same button, and you will see a lot of icons on the screen, many of which are Google services, since it owns the Android operating system. Most of these services won't start working until the tablet is connected to the Internet.
Most services will only start working when the tablet is turned on or connected to the Internet.
Discounts and sales
However, Google Play also has plenty of pleasant surprises. Namely discounts, bonuses and sales. Although the prices in the Google Store are usually not too high, the opportunity to save money is always nice.
Many users of Android devices do not even suspect that discounts on certain programs appear on Google Play almost every day. Sometimes we are talking about a symbolic 10-20% discount, but sometimes the discount is 90%, or even 100%. The only problem is that it is almost impossible to manually monitor changes in the prices of the Google store assortment - there are too many different programs in it.
But this grief is not difficult to help. You just need to install a special application that will inform you about current discounts and sales. There are quite a lot of programs of this type. As an example, I will give the AppSales application, which was already mentioned once on this site.
When you first launch the program, you will be prompted to sign in using your Google account, which will add a couple of additional features (synchronizing the list of monitored applications between different devices, receiving recommendations from friends, etc.). However, this is not necessary; you can use the program anyway.
The main screen shows current discounts. As you can see, they are quite solid. Moreover, we are often talking about very well-known programs. For example, in the screenshot you can see an 80% discount on a popular Ubisoft game.
If the general list with discounts includes too many applications that are not interesting to you, you can use a flexible filter system. For example, by selecting program categories of interest or setting a minimum discount percentage.
By clicking on the name of the application, you can view detailed information about it. Its description, system requirements, price change schedule. And if you are waiting for a discount on a specific program, you can simply add it to your watch list.
Antivirus installation
When surfing the web, you can often stumble upon malicious sites, thereby putting your system at risk. Attackers very skillfully adapt to new conditions, and for mobile devices, in addition to ordinary viruses and spyware, there are various worms that are literally capable of stealing your money by subscribing you to an endless number of mailings. Therefore, for an inexperienced user, a very good solution to protect and prevent virus attacks is to use antivirus programs.
You can install an antivirus in the same way as any other application. Open the Play Market and write the word “antivirus” in the search bar. Here is a complete list of all available antivirus programs and utilities. The choice is not an easy matter and in many cases an individual matter. Each product has its own disadvantages and advantages; in addition, different programs can offer the same functions both for a fee and for free. Choosing a specific solution for a specific user is the topic of a separate article.
Setting the ringtone
First, let's look at the classic way to set a ringtone - through the settings menu. Go to your phone settings, go to the “Sound” section and select “Ringtone”.
Here is a list of standard melodies pre-installed into the smartphone by the manufacturer. On some devices you can select your own composition directly from the same menu. For example, on the HTC One (M8) smartphone, which is used as an example in this article, this is done by the “ ” icon located in the upper right corner of the screen.
If there is no special button for selecting your own melody in this menu, then you will have to be a little more cunning. And just put the desired audio file in the folder where the system sounds are located - after that it will appear in the list of standard melodies.
To do this, you need to connect your smartphone to your computer using a cable, click the “Start” button on the computer, select “My Computer” and find the icon of your smartphone in the folder that opens. This is exactly what we need to open. Most likely, it will look like this, and its name will coincide with the name of the phone model.
We are interested in the “Media” folder. Inside it there should be an “Audio” folder, and in it, in turn, a “Ringtones” folder. Thus, the full path to the folder we are interested in looks like this: MediaAudioRingtones. This is where you should copy the melody you need.
To be sure, you should restart your smartphone. That's it, now the melody you selected will appear in the general list. In a similar way, you can set a melody for an alarm, only the path in this case will be slightly different: MediaAudioAlarms.
If you don’t want to bother with connecting your smartphone to your computer, you can make it simpler. Open the melody you need in the audio player, and then select “Set as ringtone” in the pop-up menu.
In older versions of Android, there was an unpleasant “glitch”, due to which the melody assigned in this way “went off” after rebooting the smartphone. But I have never seen anything like this on modern phones.
The method of setting a personal melody is slightly different on different smartphone models, but in any case there is nothing complicated here. To begin, open the phone book and tap your finger on the desired contact. Among other information, find the item “Ringtone”, “Call melody” or “Set ringtone”.
If there is nothing like this on the screen, then click on the “Menu” button - most likely, the item we need is there.
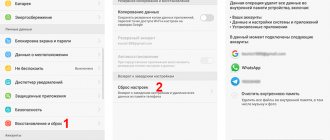
Reset via recovery
The second option allows you to reset your Huawei tablet to factory settings through the Recovery menu. It is usually used when the Mediapad is frozen or glitchy. To do a Hard Reset, you will have to:
- simultaneously hold down the volume enhancement and device launch keys;
- release the power button after the boot menu appears;
- wait for Recovery to appear;
- Select among the proposed actions the item “Wipe data / Factory Reset” (switching between menu items is done using the volume buttons, selection is made using the screen unlock key);
- confirm your decision in the dialog box;
- wait for the process to complete and reboot the device using the reboot item.
This will remove all user settings and downloads.