Today we will study ways to bypass Google account after resetting settings. Let's start with the reasons and talk about FRP, then we'll look at various ways to bypass a Google account.
With each new release of Android, Google tries to raise the level of security of this mobile operating system. So, with version Android 5.1 Lollipop, a new anti-theft mechanism was added, the essence of which is as follows: after purchase, the owner of a smartphone or tablet binds this device to himself when he enters his Google account, if the device is stolen and the attacker erases all data, he will run into protection Google Device Protection called Factory Reset Protection or FRP.
FRP Lock is an anti-reset protection system that should protect your smartphone from intruders, but at the same time, quite a few users suffered who, for various reasons, lost their accounts and passwords, as well as those who bought or sold Android smartphones; a used smartphone was locked after resetting to factory settings.
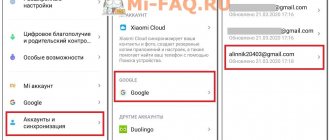
So that after resetting the phone does not require account activation, you need to disable FRP (Factory Reset Protection) before resetting to factory settings. To do this, you will need to go to Android “Settings” -> “Accounts/Accounts” and delete your Google account. If you try to enter your Google account after resetting your Android settings, but you can’t go any further, then most likely you reset your password not long ago; if this is the case, then wait 24-72 hours, then try again.
If you need specific ways to bypass Google account on different smartphones, then follow this link
Bypassing Google Account through “Keyboard Settings”
During the initial setup, go to the Wi-Fi connection page, then reset FRP Lock according to the instructions:
1. Select any network, open the keyboard by clicking on the password entry field 2. In the keyboard you need to call up the settings, how to do this depends on the keyboard, if there are several options:
- Press Spacebar
- Click “Change language”
- Hold down the “Swype” icon
- Press and hold the numeric keypad icon (123)
- Press comma
3. Once in the keyboard settings, you need to go to another window, for example, call up the help window (hidden in the upper right corner under the vertical ellipsis) 4. Immediately after going to the new window, press the “Recent applications” button, a search engine line should appear there (if not appeared, try to continue moving through the windows until it appears) 5. Click on “Search” and enter “Settings”, select the “Settings” application
6. Open “Backup and Reset” 7. Oh and click on “Reset” 8. After rebooting, your phone/tablet will be free from Google FRP Lock!
Unblocking a personal account
If you forgot your password or your Google account has been attacked by scammers, you can easily unlock it. To restore access, follow the instructions:
- Go to the Google account login page https://accounts.google.com/Login.
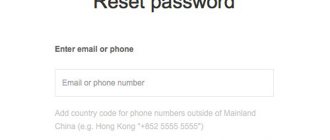
- Select "Forgot your password?"
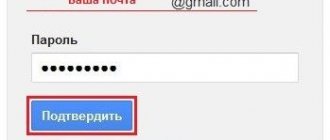
- Enter your phone number (must be associated with your account) or email address. Click Next.
- Select “Forgot your email address?” if you don’t remember your email. Then the system will ask you to specify a backup email or phone number. Enter the requested information and click Next.
- Enter one of the passwords that was previously used to log into your personal page. If the information matches, the user will gain more trust. The likelihood of successfully restoring access will be higher.
- Additionally, the system can ask the user to indicate the date of account registration and answer a security question. Try to enter as much truthful information as possible, which will help you quickly gain access to your account.
- If you have previously used a Google account on your smartphone, the system will offer to reset your password through it. Tap "Confirm Android Phone Password Reset" followed by "Send Alert." Follow the onscreen instructions to reset your password.
- If you do not have access to your smartphone, click that you cannot use the device.
- Click on the “Another way” link.
- Reset your password by sending an SMS or calling.
- Enter the secret code received via SMS or call and create a new password.
Note: To go directly to the page for restoring access to a blocked account, use the link https://google.com/accounts/recovery.
Bypassing Google account using the @ icon
Remove the SIM card and start the device. Select your language and in the next window click on the pass. Then, the system will ask you to write an email.
- Press and hold @ on your keyboard until the settings button appears.
- Go to the menu, go to the keyboard settings item.
- Go back and go to recovery and reset.
- Disable automatic recovery, then backup and reset Google settings.
Same thing just different
- Press the @ button (Google KeyBoard) and select settings
- Next, click the “Show running applications” button and write “settings” in the Google search bar
- Selecting the settings application
- In the settings, select the “Backup and reset” section and perform a reset
Method two: Using a browser and several applications
- On the language selection page, you need to tap on the empty field with two fingers and hold them until you hear the voice assistant. Unfortunately, you won’t be able to turn it off; you’ll have to endure everything she repeats.
- Swipe from top to bottom and then immediately to the right (should resemble a 90 degree angle). The voice assistant setup menu should appear.
- Select the item “Speech Setup”
. - Then you should go to Google settings by clicking on the gear icon. All that remains is to find the place where it says about the license. Click on the license and see a window with a lot of text. All licenses will be displayed at the top in the form of a list, and a little lower, text describing their purpose. You won’t be able to click on the description, but you can click on the name of the licenses. You need to highlight these names and then click on the icon with a magnifying glass. The device will immediately go into search, all that remains is to perform a few simple manipulations.
- Enter “Internet” in the search bar. A context menu will appear in which you will be asked to select a program for opening Internet links, for example, select Google Chrome.
- You will need to download two apk files from the links below. First frplock.apk
, and the second, depending on the version of Android - for the 5th or 6th version. frplock.apk [1.17 Mb] (downloads: 39264)google_account_manager_6_0_1.apk [7.92 Mb] (downloads: 28975)
google_account_manager_5_1.apk [4.76 Mb] (downloads: 16669)
- All you have to do is go to your download history by clicking on the ellipsis and find the files you just downloaded.
- The first step is to install the file “frplock.apk”
. A window about installation from unknown sources may appear, check the box and agree. - Install the second downloaded file “GOOGLE_ACCOUNT_MANAGER.apk”
, and then tap on
“frplock.apk”
. - At this point, the unlinking process can be considered complete, the old account will be deleted, and you can link another account or create a new one.
Bypassing Google Account via “adding another call”
This option is used if there is no Internet connection or it is impossible to open the phone settings menu in any way. Insert the SIM card into the phone that needs to be freed from your Google account. Turn it on, then call from another number to a locked smartphone, accept the call, call up the additional menu and add another call. Enter a random set of numbers and add this combination to your contacts. Link the number to your Google account and, if necessary, create a new one and reboot your device.
How to completely delete an account from Google Account
Google's privacy policy allows you to delete your account once and for all, rather than simply logging out of it on a specific device. For this you will need:
- Launch phone settings.
- Go to the “Google” section.
- Select "Google Account".
- Open the “Data and Personalization” tab.
- Click on the inscription “Delete a service or account.”
- Click the “Delete account” button.
- Check the boxes to confirm deletion.
- Click “Delete account” again.
Now your Google account will be erased once and for all. It will not be possible to log in to any of the existing devices. Therefore, it is recommended to think carefully before performing the operation. It may be enough for you to simply log out of your account.
Bypass Google account using “code *#*#4636#*#*”
- Insert the new SIM card into your smartphone.
- Then make a call from another phone to the new number.
- Next, accept the incoming call and then select “add new call.”
- In the Phone application, enter the code *#*#4636#*#*
- After entering the special code, your smartphone will open an extended settings menu.
- Then you need to press the “Back” button to get to the “Settings” section.
- Go to the “Restore and reset” section.
- Next, disable “Data Backup” and everything related to recovery
- We perform a reset to factory settings.
- The last step is to enter your Google account login and password.
Popular reasons for blocking
Common reasons can be listed at a glance: 1. Locking the phone, on which the default settings have been restored. Google has implemented a security feature called Factory Reset Protection, or FRP, into its own operating system. If an account was connected on the phone and the phone was reset to factory settings, FRP protection will work. To unlock, it asks you to enter the address and password from the previously synchronized account.
2. During registration, indicate your age is less than 13 years. The Good Corporation has its own policy for providing services for children. While they are minors, their parents are responsible for them, so an account for the child is created through the Family Link platform for parents. Creation and recovery of a blocked account or forgotten password is done through it. A parent account connected to the service is required.
3. If your Google profile is connected to G Suite as a user profile, only an admin can unlock the account in the Google Admin Console.
4. Disabling a regular profile for violating the rules for using services. In this case, only communication with the support service will help.
Repair shops sometimes list unlocking a Google account from a phone (meaning FRP protection) as a service. What is the price? Within 1000 rubles.
Bypassing Google Account via Fastboot
Fastboot is useful for quickly updating firmware without having to use recovery mode. If your Android device supports Fastboot, then you can try performing an FRP reset through it.
To do this you will need:
- Computer
- Installed Android drivers
- Download Fastboot to your device
- Put the device into Bootlader mode
- Then you can enter the following commands: fastboot oem clean_frp or run the following command fastboot erase persistent, fastboot erase frp, fastboot erase config
Bypassing Google Account via “ADB”
ADB - allows you to control your Android OS device via a computer. After the reset, you need to try to enter the settings menu, after which you will need:
- Computer
- Installed Android drivers
- to device
- Connect Android to computer and run ADB RUN
Then enter the following commands:
- adb shell content insert —uri content://settings/secure —bind name:s:user_setup_complete —bind value:s:1
- adb shell am start -n com.google.android.gsf.login/
- adb shell am start -n com.google.android.gsf.login.LoginActivity
Bypass Google account using "Comma"
After resetting the settings and starting the system, when you see the FRP page where you need to enter the previously registered Google account, press “,” (comma) on the keyboard until the settings pop-up window appears.
- Click Google Keyboard Options (gear icon).
- Tap the three dots in the upper right corner and select Help and Feedback.
- Go to any category and select part of the text by holding your finger on some line.
- You will see a web search icon.
- Click on it and in the search field that appears, click “Settings”.
- You will then enter the system's Settings application. Go to “For Developers” (if this option is not in the list, then go to “System” - “About phone” and click on “Build number” 7 times).
- Go back and open Developer Options.
- Scroll down a bit and you'll see "OEM Unlock" or something similar. Activate it.
- Hold the Power button to restart your phone.
- Now, when you boot, you will see the “Add Account” page in the FRP window.
- The profile with which the phone is synchronized has been deleted. All you have to do is enter new data and you will be logged into the system.
Using dcp apk app
A fairly effective way to remove Google verification when resetting your phone to basic settings is to use the dcp apk mobile application.
What should be done:
- Charge your phone to 100%, but do not disconnect it from the charger (this is very important);
- Turn on your phone and go to the screen where you are asked to enter your email address;
- In the email field, enter subscribe and long press (tap) on this word until a small menu appears;
- From the menu, select "More" and then "Help". The Google application will open;
- In the Google app search bar, type Chrome and from the list of suggestions, select the Chrome app (shown with the Chrome icon). This operation will open the Chrome browser;
- In the search bar of the Chrome browser, type test dpc app and open the first link https://test-dpc.ru.uptodown.com/android (the application can also be downloaded from Yandex.Disk)
- In the web page that opens, find the link (button) to download the apk dpc file and use it to download the file to your phone;
- Tap the back button on your phone to return to the Google app;
- In the Google application, enter “Downloads” (or “Downloads”), and open the download application from the list proposed by the system;
- Here you will see the downloaded “Test DPC” application file. Run the installation of this application. At this point, your phone should be 100% charged and connected to the charger;
- After installation is complete, open this application. In the menu that opens, select “Set up device owner”. Follow the application's instructions, confirming the next step via "Encrypt";
Select the option “Set up device owner” - While the application is running, the phone will reboot several times. When prompted, provide all necessary permissions;
- Eventually your phone will launch the home screen without asking for a Google account;
- Go to the settings of your gadget, reset its settings to factory settings and restart your phone;
- After rebooting the phone, the odious Google screen asking you to confirm your account will be absent.
Bypassing Google Account via “Send/Share”
- We go through the initial device setup menu and connect to the Wi-Fi network
- Enter the e-mail and try to select it, the message “Send / Share” appears, select this item
- Open via SMS application
- In the to whom field we enter the number 112 and in the body of the letter we write some text again and send it
- A notification will appear that the SMS was not delivered, select this message
- At the top there will be a “Call” button, click on it
- In dialers, erase number 112 and enter *#*#4636#*#*
- A menu for testing the device will open, click on each item, one of them will redirect you to Android Settings
- In the settings, go to the “Reset and Recovery” section and do a full reset
Bypassing the Google account of devices with a Mediatek chip using the “SP Flash Tool”
Install the drivers, SP Flash Tool and download the scatter file from your firmware (you can download the full firmware, unzip it and take the scatter from there)
Important! We need a scatter file from the current firmware! If you have Android 5.1 installed, then scatter from Android 6.0 may not work!
1. In scatter-loading, specify your scatter
2. Go to the Format tab - Manual Format Flash
3. Now you need to indicate at what address Google FRP Lock is recorded, to do this, open your scatter.txt with any text editor (NotePad++ will be more convenient) and run a search (Ctrl+f) find frp, it should find something like this:
4. Now we transfer the value “linear_start_addr” from scatter.txt to “Begin Adress [HEX]” in the SP Flash Tool, also “partition_size:” to “Format Length[HEX]”, this is where Google FRP Lock is located
5. Click Start and connect the switched off phone to the PC, wait until the cleaning is completed
Bypass Google account via SD card
This FRP reset takes place thanks to a pop-up message about the connected memory card, from which you can get to the system settings, proceed in order:
- Insert the memory card into a working phone
- In the notification, click OK, you will be taken to the storage settings
- Click on "App Data"
- Go to the "All" tab and find "Settings", click "Start"
- Settings open, select "Backup and reset"
- Now click on “Reset DRM” and confirm deleting the keys
- Go back to Backup & Reset and perform a factory reset
- Wait for your phone to turn on, now you are free from FRP Lock.
Bypassing Google Account via “Reset DRM”
This is a more powerful way to solve the problem of a locked smartphone. To reset DRM:
- Connect to a Wi-Fi network.
- During the scan, return to the list of available networks.
- Select any other network and enter any data in the password field. Copy the entered password, open the additional menu and turn on hints.
- Go to your phone settings, recovery and reset category.
- Reset DRM licenses.
- Return to network connections, enter a new account.
- This completes resetting the licenses and linking another account.
Official way to reset google account
Everything is simple here. Go to your phone settings. Select the option to reset/restore factory settings. Disable or completely delete your account (if you need a completely clean phone). It should be noted here that in different localizations, from different manufacturers, items may be called differently. However, the meaning and their location are unchanged.
Let us note right away: in order for the phone to forget its Google account after resetting the settings, just click on reset. This will only return everything to the original settings of applications and some files. Even information about third-party accounts will be saved. Therefore, read how to delete a Google account after resetting the settings.
Bypassing Google Account with QuickShortcutMaker
By the way, I would say that this method helps 80% of cases that are associated with FRP. So I recommend using it first.
- Turn on the phone and connect to Wi-Fi;
- In the field where you need to indicate your email, as in the first option, write several letters and highlight them;
- In the menu that appears, click on the three dots and select the item “need support or help (ASSIST)”, I don’t remember exactly what this item is called;
- Next, you will be transferred to the “Google Now” window, where you will be offered help, but here we need to click on “No, thanks”;
- After this, Google search will appear, with which we can navigate between the different menu items of the phone. So, enter Chrome in the search bar and launch it by clicking on the icon that appears;
- So let's start as usual. You need to get into Chrome. Therefore, we carry out points 1 to 5, which were indicated in the previous version;
- Next we look for and download the installation apk file, Test DPC programs;
- We start its installation, and, if necessary, allow installation from unknown sources.
- In the application that opens, mark the second item “Set up device owner” and move on;
- We confirm the transition to the next step several times by clicking on “encrypt (encrypt)”;
- After this, the phone should reboot and a few seconds will pass to configure the previously installed parameters of the Test DPC application;
- Then the phone will turn on itself and again, as usual, we set up the phone. A few more new items may appear, but you don’t need to change anything in them, just skip these steps and move on;
- Having configured the phone, it should boot and we have access to its basic settings, this is exactly what we need. So first of all, go to “Settings”;
- Go to “About device” - “Software information” and click on “build number” several times until a message appears that developer options are now available to you;
- We go back and go to “Developer Options”, where we turn on the “OEM Unlock” item;
- Then we go back to the main settings menu, select the “Restore and reset” item and do another data reset;
- After the phone reboots, set up the phone again by registering a new one or entering an existing Google account;
Android Settings Using QuickShortcutMaker
This is another out-of-the-box approach to the case where you can't get into an Android device with FRP. When you get to a screen asking for data input, you need to return to the place where you select a language.
Procedure:
- Select English from the list;
- Next, quickly press the “Home” button 3 times. It is located in the middle of the three main buttons on the smartphone panel. The voice assistant should notify you that TalkBack is enabled;
- Switch back to Russian. You need to draw an oblique line across the screen with your finger. Approximately in the area shown in the screenshot. Repeat this action several times if necessary;
Swipe your finger across your smartphone screen - The general context menu should open. In it you need to select “TalkBack Settings”. The app is also called Android Accessibility Suite;
- When the settings open, you need to turn off TalkBack in the same way - press the “Home” button 3 times;
- Then select “Privacy Policy” and select any mobile browser to access the network;
- In the search bar, write the query “QuickShortCutMaker” and click the search button. It is important to find a site with the APK file of this application without opening the Google Play address;
- Download and then install the application. Do not try to follow these instructions to get directly into your smartphone’s settings. The system will immediately “throw you out” to the initial screen, where it all began. After downloading, a notification should appear asking you to install the application;
- Open the app and select the Advanced Search tab.
Enter "TouchWiz" here and select it from the results; - Next, click on “View”.
And immediately you will see the Android desktop. Go to settings and click “About device”; - Next, select “Software Information” and quickly click on “Build Number” several times (about 7-10 times) to enable developer mode;
- Now go back and select Developer Options;
- Turn on the “Unlock, provide ...” option, then go back and select “Backup and reset” and “Data reset”;
- Confirm the data reset and wait for the process to complete.
Next, you will also need to create a new account or log into another existing one. As you noticed, during the process you will need Internet via Wi-Fi. To open TolkBack settings, you may need to press two fingers horizontally along the edges of the screen instead of swiping your finger across an oblique line.
This may be useful: Mobvista700 - what is this folder on Android?
Android won't accept Google account after factory reset
0
Comments (8)
- Add yours
Nita
- about 2 years ago
- #3387
This comment was minimized by the moderator on the site
Thanks to your article, I got around Google using Test DPC. nothing else helped
Nita
- Answer
- Complaint
Gennady
- about 9 months ago
- #3417
This comment was minimized by the moderator on the site
Good evening guys, I need your help, I have a problem on the rarest phone)) I have an LG G6 and not one of your methods works on it Android 7.0 I tried all your methods and it doesn’t work. Help, I think you will enjoy suffering with...
Good evening guys, I need your help, I have a problem on the rarest phone)) I have an LG G6 and not one of your methods works on it Android 7.0 I tried all your methods and it doesn’t work. Help, I think you will enjoy struggling with it)))) if it works, please write to me
More details Gennady
- Answer
- Complaint
MobileOC.ru Gennady
- about 7 months ago
- #3420
This comment was minimized by the moderator on the site
Hello, have you tried this method?
MobileOC.ru
- Answer
- Complaint
Egor
- about 5 months ago
- #3426
This comment was minimized by the moderator on the site
redmi go nothing works save
Egor
- Answer
- Complaint
Mobileoc.ru Egor
- about 5 months ago
- #3430
This comment was minimized by the moderator on the site
Good afternoon, there are many simple methods on YouTube, if they don’t help, then try this method. Instructions and necessary files.
Mobileoc.ru
- Answer
- Complaint
Kirill
- about 5 months ago
- #3428
This comment was minimized by the moderator on the site
Good afternoon, I have a Samsung note 8 and more than one method does not work.
Kirill
- Answer
- Complaint
Mobileoc.ru Kirill
- about 5 months ago
- #3429
This comment was minimized by the moderator on the site
Good afternoon, if the simple methods from YouTube did not help, you can try to reflash your smartphone using the Odin3 program. Here are the instructions and all the necessary files
Comment was last edited about 5 months ago MobileOC.ru Administrator Mobileoc.ru
- Answer
- Complaint
Daniel
- about 4 months ago
- #3432
This comment was minimized by the moderator on the site
Guys, how to enter the Voice Assistant menu after resetting the settings to bypass Google account on Samsung j5
Daniel
- Answer
- Complaint
No comments posted here yet
Unlocking your phone using your Google account on your computer
To protect their smartphone, many users use a pattern or PIN code. If you forget the secret combination, access to the phone will be blocked. To reset protection using your Google account on your computer, follow these instructions:
- Follow the link https://www.google.com/android/find and log in to your account.
- If multiple devices are linked to your account, select the one you need from the list on the left.
- Click "Clean device".
- Take your smartphone. The system will no longer prompt you to enter a picture password or PIN code. The user will only need to log in to his Google account.
Note: To restore your phone using this method, it must be connected to the “Location” and “Find my device” functions.