other methods
It is worth noting that you can copy data to all your devices in other ways.
For branded shell
Almost all smartphone manufacturers use proprietary Android shells (add-ons) on their gadgets. Some of them have a synchronization function for your own profile.
Note! For example, we used Meizu with the Flyme shell, which provides a Meizu account. Different manufacturers' own profile may differ or be completely absent.
Similar actions for Mi-account and others.
Third Party Applications
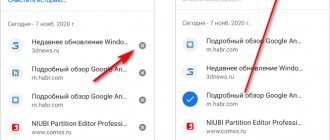
There are many apps available in the Play Store that allow you to back up your data and sync it to another device. Let's look at the example of one of the most popular programs - G Cloud.
- Install and launch the application.
- Click "Don't have an account yet."
- Select “Register with Google+” → enter your account.
- Check the boxes to add the items to the cloud → click on the button with the floppy disk.
- Wait for the process to complete.
- Your data is now in the cloud.
- Open the side menu → “Restore”.
- Select your smartphone.
- Go to the folder with the relevant data.
- Click on the file → “Recover”.
For automatic synchronization:
To install data on another phone, just install the application on the second device → log into the same account.
Synchronization with PC
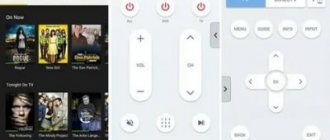
You can access the elements of your smartphone via your computer using the MyPhoneExplorer program.
Most modern smartphones run on the Android operating system, which occupies the majority of the market. By the way, the main developer is the Internet giant Google.
The system can be linked to an account, and the account is the Gmail.com mailbox, which also belongs to Google. Very convenient: you create one account that you can use in a wide variety of Google services, including your Android device. You can even use one account on multiple devices. Be that as it may, an account is required, among other things, to be able to download applications from the Google Play Store, as well as to synchronize data. Let's talk about the last point in more detail.
Reasons why Google and Android synchronization fails
h21,0,0,0,0—>
If Android does not synchronize data with the Google server, then you should first look for the reason in the operation of the mobile device. Yes, errors can occur on Google's side, but this is very rare. In addition, such failures are instantly detected and eliminated. So if Android refuses to sync contacts, mail, photos and other information, follow these steps:
p, blockquote5,0,0,0,0—>
- Reboot your device.
- Check the stability of your Internet connection. Connect to Wi-Fi if possible.
- Make sure synchronization is enabled and settings are configured correctly.
- Remove your Google account and add it again.
Read How to recover deleted photos on Android
p, blockquote6,0,0,0,0—>
To delete an account, go to “Settings” -> “Accounts” -> “Google” -> call up the additional menu (the button in the form of three buttons at the top right) and click “Delete”.
p, blockquote7,1,0,0,0—>
Increase
When you delete an account, no data will be lost, since the account itself will remain intact. Restart your smartphone, and the next time you turn it on, add your Google profile again, specifying your username and password.
p, blockquote8,0,0,0,0—>
Increase
If you continue to have problems with syncing, try adding a different Google account. If neither account works properly, flash your device. It is recommended to install official firmware, since various custom assemblies may have shortcomings that lead to various failures in the system.
p, blockquote9,0,0,0,0—>
Read How to sign in to Google account on Android phone or tablet
p, blockquote10,0,0,0,0—>
Enable synchronization
Enabling Google contacts syncing varies across devices and OSes. On Android this feature works by default, on iOS you will have to connect your Google account manually, and on Windows Phone you will have to pay for the G Suite package.
Android
On most Android devices, synchronization is enabled immediately as soon as you link your Google account to it. However, checking that it really works and correcting errors if necessary is never a bad idea.
Procedure:
«>
- Open system settings.
- Go to "Accounts".
- Open the profile you want to sync with.
- Make sure the switch next to Contacts is in the On position.
If the device is connected to the Internet, data transfer occurs automatically. As soon as you add or delete a contact on your smartphone, the information on the server is updated.
You can also synchronize manually. To do this, call up the additional menu and select “Synchronize”.
The procedure for enabling synchronization may differ from that described depending on the version of Android and the smartphone manufacturer, but only slightly. On Samsung, Xiaomi, LG, Honor and any other model, data transfer is activated there - in the Google account settings.
iOS
On iOS, the choice of synchronization method depends on the system version. If your device has iOS 7 or higher, the easiest option is to add a Google account to the list of accounts.
For this:
- Go to the Settings app.
- Open the “Accounts and Passwords” submenu.
- Click "Add Account".
- Select from Google list.
- Enter the email address associated with your Google account.
- Enter your account password.
- Move the Contacts switch to On.
Synchronization will start automatically. From now on, all contacts from the iPhone's phone book will be duplicated on Google servers.
Sometimes you may need to enable SSL to complete this operation. This can be done in the properties of the added Google account. In its settings there is an “Advanced” section. Inside it is the “Use SSL” switch. Turn the switch to the On position and apply the configuration.
CardDav account is used instead of a Google account . But the order of its connection has slight differences:
- Repeat steps 1-3 of the previous instructions to get to the Accounts screen.
- Click on "Other".
- In the Contacts section, select CardDav Account.
- Fill in your account information.
In the “Server” field, enter google.com; in the “User” line - email address; “Password” is the password for your Google account; the description can be anything. To apply the settings, click “Next”.
Now all contacts from the iPhone phone book will be automatically sent to Google servers.
Windows Phone
On Windows Phone, since 2013, contact synchronization with the Google service is not available. This option is only available when using the paid G Suite business package. Its cost starts from $6 per month.
Checking synchronization
To make sure your recordings are synced with the server, use the Google web interface. Any device with Internet access and a browser is suitable for this. It is more convenient to check whether contacts are saved using a PC or laptop, but you can use a smartphone and tablet.
Procedure:
- Go to google.com.
- Log in to the account from which you set up contact synchronization.
- Expand the full list of Google services and select Contacts.
You will be taken to the web interface of the Google Contacts application. All phonebook entries synchronized with the smartphone are displayed here. You can manage them: change names and numbers, add new contacts and delete unnecessary ones. All changes will be immediately displayed in the smartphone’s phone book, since synchronization is a two-way process.
What to do if nothing helps
What should I do if the Google android account synchronization error is not resolved at all? The only option is to reset the settings to factory defaults; to carry out this procedure you need to perform a few simple steps:
- Save all elements of the device to a flash drive;
- Open general settings;
- Press reset (Figure 6);
- Reboot your phone;
- Recover data saved on removable media;
- Set up auto exchange.
If you have encountered an error synchronizing your Google android account on your phone, you should not reset the settings, try first the traditional methods described above, most often they help get rid of problems with the transfer of program elements.
Perhaps starting your account, which your phone cannot link to, will be easier than it seems at first glance.
Figure 6. Window for restoring the device to factory settings and deleting all data from the device memory
Disable synchronization
There are two ways to turn off contact synchronization :
- By opening the profile properties and sliding the Contacts switch to the Off position.
- By deleting your Google account from your smartphone.
These methods work on both Android and iOS. To access the settings, use the instructions for enabling synchronization on your device.
Be careful: Google servers will retain records that were copied before synchronization was turned off. If you delete numbers from your smartphone’s memory and then turn on synchronization again, all deleted entries will return. To prevent this from happening, do not disable contact synchronization or additionally delete entries in the web interface manually.
https://compconfig.ru/internet/sinhronizaciya-kontaktov-google.html
Original post and comments on LiveInternet.ru
Errors when syncing contacts
Synchronization does not always go smoothly. You may encounter the following errors:
- Contacts are not synced.
- The phone book displays names that you have not added.
- After deleting from the smartphone, the contacts reappear in the phone book.
It’s easy to deal with the appearance of deleted contacts - we’ll talk about this in the section on disabling synchronization.
The display of unknown names is usually due to the fact that one account is used by several users on different devices, for example, a parent and a child. When synchronization is enabled, a contact added to the memory of one smartphone automatically appears in the phone book of the other.
To eliminate the causes of contact synchronization failure, different methods are used. These include checking synchronization settings, forcing data transfer, re-adding an account, and clearing the application cache. But before you use them, check the basic system parameters:
- Make sure synchronization is enabled in your Google account properties.
- Check your network connection. To do this, open any page in your browser - it should load without errors.
- Make sure you are logged in and checking synchronization in the same account.
In addition, Google recommends installing system updates (if available). This helps in cases where the update contains bug fixes that prevent synchronization from working.
Forced synchronization
If automatic or manual sending of data is ineffective, try forcing synchronization:
- Open date and time options in system settings.
- Disable automatic date, time and time zone settings.
- Manually set a custom date and time.
- Close settings and return to the Android home screen.
- Open the Date and Time section again.
- Manually set the date and time correctly.
- Enable automatic detection of date, time and time zone.
Additional synchronization permission
On some Xiaomi models, contact synchronization is interrupted by the battery saving system. This can be easily fixed using the third-party Google Contacts Sync app. It is often pre-installed on smartphones of this brand, but, unfortunately, it is not available on Google Play. If the application is missing, download it as an APK file from our link, and then transfer it to install on your smartphone.
After installing Google Contacts Sync:
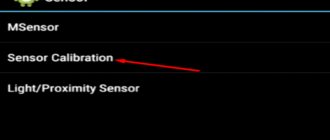
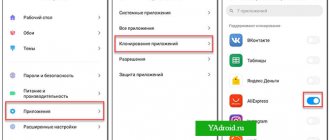
- Open the Applications section in Settings.
- Select Google Contacts Sync.
- Turn on the “Autostart” mode.
- For the “Battery Saver” parameter, set the value to “No restrictions” (“Battery saver” - “No restrictions”).
Set permissions for the application. Go to the "Permissions" section and select the following:
- Modify and delete contacts.
- Read your contacts.
- Access accounts on device.
- Start in background.
After this setting, MIUI will no longer disable contact synchronization.
Removing and adding an account
Synchronization errors may be related to the Google account itself. To fix them, disable the account on your device and then add it again. This procedure is safe; nothing will be lost from the device’s memory.
How to do it:
- Open "Accounts".
- Open your profile settings.
- Click on the three dots button to bring up the menu.
- Select "Delete Account".
- Confirm deletion of data.
Other ways to remove a Google account from an Android device are described in this article.
The next step is to reconnect the remote profile:
- Return to Accounts.
- Click "Add" and select Google from the list.
- Enter your email address and password as you would during normal login to your account.
After adding an account, enable auto-sync and immediately start forcing the data to be sent. Using the Google web interface, check whether your contacts are saved on the server.
Clear cache and delete data
Another radical method for eliminating synchronization errors is to delete contacts and clear the cache.
To avoid losing entries from your phone book, create a backup copy of it:
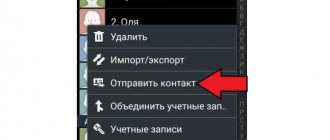
- Go to “Contacts”.
- Go to "Manage Contacts".
- Click Import/Export Contacts.
- Export contacts to your device memory. They will be saved in a VCF file format.
The next step is to clear the program cache:
- Open the “Storage” section in the settings.
- Select “Applications”. https://compconfig.ru/wp-content/uploads/2020/02/razdel-prilozheniya-300×79.jpg 300w" sizes="(max-width: 600px) 100vw, 600px" />
- Open Contacts settings.
- Click Clear Cache.
Now you need to return contacts from the saved copy. For this:
- Go to “Contacts”.
- Go to "Manage Contacts".
- Click Import/Export Contacts.
- Select Import from Storage Device.
- Select the profile you want to save your contacts to.
- Select your backup file.
- Wait while the entries are imported.
Resetting the cache resolves errors that prevent synchronization from occurring automatically.