How to Set Date and Time on Android
The correct date and time not only helps the user to be more punctual - few people would want to miss the bus because the time was set incorrectly - they are also important for the operation of some applications, which, if the data is incorrect, can begin to crash and work with errors. Therefore, it is strictly recommended to set the correct date and time on the device.
The process of setting the date and time in different versions of Android is approximately the same: except that in new devices the system asks you to set up the data immediately, even before you start using applications. In addition, the names of menu items responsible for time and date may differ slightly from each other in different OS versions.
- Look for Settings on your desktop or in the All Apps menu. Click on it: the standard Android settings window should open. The settings of an Android mobile device contain a list of changeable parameters
- In “Settings”, click on “Advanced” and select the “Date and time” option. In some devices, this item is located in the “System” tab or even placed in the main settings menu. In date and time settings you can change the time, date, time zone and time format
- Click the item you want to change and select a new date or time, then click OK. In the window for setting a new time, you need to enter the exact time and click OK
After these simple manipulations, the date and time should change.
Video: setting time and date
What to do if time goes wrong
Reasons why the current time differs from what is displayed on the phone display:
- battery replacement;
- reboot the phone;
- infection with viruses that interfere with the operation of the system.
In the first case, the clock may get lost if the user removes the battery from the device. When reactivating, you need to re-enter the time indicators.
Important! New smartphones are distinguished by the presence of a non-removable battery. Therefore, the indicators will be less likely to go astray.
You need to clear your smartphone’s memory if the time resets to zero after a reboot. To solve the problem, you can set automatic settings.
Viruses have a bad effect on the working condition and functions of the gadget. An antivirus program is required to scan the device.
Error in displaying information
If problems arise
It happens that when setting the date and time, errors occur: changes are not applied, the newly set time and date are reset, or even thrown out of “Settings” with an error. There can be many reasons, but the most common ones are:
- you have auto-time synchronization enabled, and therefore attempts to manually change will lead to nothing. To disable auto-sync, you need to uncheck “Use network date and time” in the date and time settings;
- the problem is associated with a single system failure and should stop after a factory reset or reboot;
- defective device firmware - in this case, if you are not an experienced user, it would be best to contact a technician at a service center, since if you try to reflash the device yourself, there is a high risk of damaging it;
- there was a conflict between the time zones of the phone and the SIM card (most often this happens with the Tele2 operator).
To fix the time zone and SIM card conflict issue, follow these steps:
- First, save important data from your phone to another location, otherwise it will be erased.
- Then remove the SIM card and perform a factory reset to return the phone to its original state. Typically, this option is located in the “Settings” - “Backup and reset” menu and is carried out by clicking the “Reset settings” button. Under no circumstances should you perform a reset on rooted devices: it is dangerous and can destroy your firmware. To reset your phone, you need to click the "Reset settings" button at the bottom of the menu
- Now turn off automatic time zone detection in the date and time settings. To do this, uncheck the “Network time zone” checkbox. To resolve the error, you need to uncheck the “Use network time zone” checkbox.
- After that, enter your time zone. Sometimes, for correct operation, you need to set not the standard Moscow time GMT+3, but the Brussels time zone (GMT+2).
- Now you can insert the SIM card back and try changing the date and time again.
Possible problems when setting the time and their solutions
After setting new time settings, you may encounter two problems:
- time settings are constantly reset;
- The message “An error occurred in the Settings application” appeared on the device screen.
The following methods will help you correct these misunderstandings.
Reboot
First try restarting your smartphone. This action will start all processes again, and perhaps the errors will disappear, and the time settings will be saved.
Auto-sync
If rebooting the device did not work properly, you need to enable auto-sync. This feature allows the phone to automatically update its time settings when connected to the Internet. To enable auto-sync, follow these steps.
Installing 360root and ClockSync applications
If your phone does not have an auto-sync feature, you will need to follow these steps.
Factory reset
However, even after automatic synchronization is enabled, the time may still change on its own or generate an error. In this case, you will have to reset your phone to factory settings.
Auto date and time synchronization
If you don't want to set the time and date manually, you can use Android's built-in feature to automatically synchronize time with the network. Or, if maximum accuracy is important, its improved version, the implementation of which will require root rights.
Normal auto-sync
To synchronize date and time with network data, you need to tick just one item located in the “Date and Time” settings menu. It is usually called “Use network date and time,” but the options “Automatic date and time,” “Synchronize with network,” and other similar options are also possible.
After checking the box next to this item, the date and time on the phone or tablet are synchronized with the network data and will henceforth be determined automatically. While this feature is enabled, you cannot manually set the date and time.
When o, the system itself checks the date and time with the network
"Smart" synchronization
Standard synchronization is not very accurate and operates with an average error of 500 milliseconds (that's about half a second). This is due to the fact that when it was created, old and rather slow data transfer protocols were used. As a result, information about the current time simply does not have time to arrive on time and is slightly delayed. This leads to an error that is corrected by numerous applications for “advanced” time synchronization.
- How to set the time and date on a fitness bracelet: instructions for all popular models
To work properly, applications need to interfere with Android settings, but by default they do not have this right. Therefore, in order to carry out smart synchronization, you need to have superuser rights, or root rights, on your device. However, those applications that are the most advanced, with a sin in half, but do without them.
The algorithm for obtaining root access is unique for each phone model, of which there are currently hundreds. There is no general method that would allow you to gain superuser rights on any device: even the most popular apps for “hacking” root rights work with a limited set of models, and whether a particular application will suit you is unknown. To obtain root access on a specific device, you need to read the technical documentation on rooting it on a specialized resource.
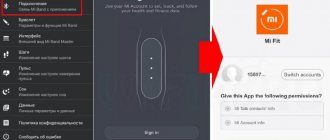
There are several smart sync apps, and they are all similar to each other. Let's look at working with them using the ClockSync application as an example.
- Turn on the application. Once loaded, it shows us the time set on the device compared to the exact time that is read from a special server. The difference is approximately 20 s. In the ClockSync application window you can see that the time on the phone lags behind the real one
- Call the application's context menu and select "Synchronize". If your phone or tablet is rooted, the app will ask you to give it permission to tamper with the system. Click Submit. On a device with root rights, the application will ask for access to settings, which must be given
- If there is no root access on your phone, then before synchronizing, go to the application settings (the entrance to them is located there, in the context menu) and select the “without root” operating mode. It may have limited functionality, but does not require superuser rights. The application has a “no root” operating mode, in which some functions will not work
- After synchronization, the time interval between the current time and the time on the device should be reduced to 0 milliseconds. After synchronization, the time difference is 0 ms
ClockSync can be downloaded from the official page on Google Play. However, this application is one of the most resource-intensive and multifunctional: for example, it allows you to change the server with which the time is checked. If you are not such an advanced user, then you can use some simpler analogue: for example, Smart Time Sync.
We set the most accurate time and exact date
Now you know how to change the date in Android - to do this, you need to visit the system settings and use the “Date and Time” item. Data installation is carried out in Android in manual or automatic modes. If you want to get the most accurate time, you should select automatic detection.
But what if the mobile network accuracy is not enough or your device cannot communicate with mobile networks? In order to get accurate data about the current time and current date, you need to use third-party applications. The most powerful application for automatic time synchronization is ClockSync from developer Sergey Baranov
. Despite its more than modest size, the utility has decent functionality.
Here we will find:
- Automatic time setting with root rights;
- Automatic time setting without root rights;
- High precision mode;
- Selecting a server for time synchronization;
- Setting the request interval exactly in time;
- Battery saving mode;
- Detailed statistics;
- Time zone database (will be useful for older smartphones);
- Automatic time zone detection;
- Function for updating system data about time zones.
Install the application and get the most accurate time on your watch. Also, you will not need to worry about setting the date if it goes wrong for some reason.
The function of updating system data on time zones will be useful to many Russian users whose smartphones and tablets do not know about the absence of a summer/winter time change and about changes in time zones. However, this function requires root rights to work.
After flashing the firmware, many Android smartphone users may experience that the clock disappears from the main screen. Typically, setting the clock and date on the main screen takes no more than a few minutes. The proposed material outlines an algorithm of actions on how to return the clock to the screen of an Android smartphone and install a similar new clock from Google Play.
Setting the time zone
You can change the time zone defined on the device in the same settings item, “Date and time”. The “Time Zone” line allows you to change the default zone.
The time zone, just like the date and time, has an auto-synchronization option. You can turn it on if you're unsure about your own time zones, but this setting can sometimes glitch in older versions of Android, so it's recommended to set it manually there.
To synchronize the time zone with the network, you need to enable the "Use network time zone" option
You can find out which time zone is used in your region using the media at your place of residence, including the Internet. The Moscow zone is GMT+3; in St. Petersburg and central Russia it is also mainly used. In general, time zones from +3 to +12 are used in Russia.
To select a time zone, you need to click on the “Time Zone” button and select from a huge list the one that is used in your region. After this, the time will be set in accordance with the selected zone.
To select a time zone, simply find the one you need in the list and click on it
Time zone gets confused
The time zone can go wrong in several cases: either auto-synchronization is not working correctly (in this case, you need to enable manual zone selection), or the wrong region is set in the settings of your phone or tablet.
- Region settings are located in “Advanced” - “Region”, it is also possible to display this item in “System” or “Main Menu”. Region settings are located in the options menu in the “Advanced”, “System” tab or in the main menu
- To change your region settings, select the option you want from the many options. After this, synchronization failures should disappear. To select the desired region, just click on it
In addition, the cause of the failure may be an error in the databases. In this case, only one of the applications for “smart” synchronization, which has already been mentioned, will help; the servers they use usually detect the time zone without errors. However, root access is required to use such applications. In the settings of such applications there is an “Auto-sync” item, which can only be enabled with root. If automatic time zone synchronization is enabled, the application will also determine the time zone automatically - and do so more accurately than the system menu.
In the main settings menu of ClockSync and similar applications there is a button “Auto-sync time zone”
Video: “fixing” the time zone through the application
Setting the time and date on Android is simple - if the phone does not require maximum correctness of the result. If you want your watch to be extremely accurate, you will have to try. In any case, correctly determining the time is a valuable feature of the phone, which is extremely important for its normal operation.
- White screen on an Android phone, what to do. White Screen on Phone What to Do
—> Contents
How to select, set, or add a new time zone
To find out the time zone of your region, go to https://www.gmt.su/city-time/country/Russia/ and find the city closest to you in the list. On the right side of the page you will see time zone information. For example, in Kaliningrad it is GMT +02:00. You will need to select this information in the settings of your phone.
Sometimes even the simplest operations cause minor difficulties for users. For example, novice owners of Android devices often wonder how to change the date in Android? The thing is that this does not require any special knowledge. And if you have ever held a mobile phone in your hands, you can always set the time and date in your smartphone. Let's take a look at how date and time are configured on mobile devices.
How to change the date in Android manually? We assure you that for this you will not need superuser rights, mysterious commands or access to the engineering menu. Android is a very simple operating system, so changing the date is as simple as possible here - just go to the settings. Manually setting the date and time is necessary on devices not connected to the network, since there is simply no other synchronization here.
In order to change the date on Android, and at the same time adjust the time, you need to visit the system settings. This is done in two ways:
- Slide the top curtain and click on the gear symbol;
- Go to the main menu, select the “Settings” item (also in the form of a gear symbol).
At the bottom of the list we will see the “Date and Time” item - you simply cannot miss it.
Please note that in some Android devices the settings menu is modified and divided into several tabs - the item for setting the date and time in such devices is located in the “Options” tab. In some smartphones, the settings shortcut is displayed directly on the desktop.
Having entered this point, we will see a lot of interesting things. If your smartphone or tablet does not have a SIM card installed, automatic synchronization will not be possible. In order to set the correct time and the correct date, you must uncheck the “Auto-detect time” checkbox. After this, the options for manually setting the time and current date will become available. Next, click on the “Set date” item, select the current date, current month and current year, click OK - now the date is set correctly.
At the next stage we set the time. To do this, you need to tap on the “Set time” item - set the hours and minutes, click on the OK button. Next, you need to uncheck “Auto-detect time zone” and select your time zone manually. If the time is wrong, correct it.
The problem with time zones often causes a lot of inconvenience to domestic users - in our country they either cancel the transition to winter/summer time or play with the number of time zones. As a result, smartphones and computers have problems setting the correct time.
Next, you can select the time display format - it can be 12-hour or 24-hour formats. By checking the box, you will select a 24-hour display format, and by unchecking the box you will switch to a 12-hour format. Below we select the date display format - in the Android settings there are several ways to display the current date, differing in the location of the year, month and day.
If you don’t know what to choose, stop at the “Local” option; this format implies displaying the date in the following order - day, month, year (format accepted in Russia).
First way
To set the correct time and time zone on your smartphone, proceed as follows:
- go to “Settings” and find the “System and Device” category;
- click on the “Advanced settings” column (“Advanced” on older firmware versions);
- open the “Date and Time” tab;
- make active the checkboxes next to the words “24-hour format” and “Network time zone”;
- enter the required time.
After this, the problem should be resolved.
How to change the display: only hours and minutes, or days of the week with date
In Windows, you can present the time display a little differently: with a date, with days of the week, etc. (see screenshot below, I specially made 3 different options).
By the way, the recommendations below are relevant for Windows 10...
To configure display:
- first you need to press Win R (to call “run”), and use the intl.cpl command;
- then open additional parameters, and in the “Date” and “Time” section change the format to the one you need (more details