What is firmware on Android?
For the functioning of each smartphone, firmware is required to ensure correct operation of the Android operating system, installed on most mobile devices and discussed throughout the article, with the hardware of the device.
After purchase, it is built into the smartphone by default, however, if the capabilities provided in the original are limited, you should consider the option of installing custom firmware, the implementation of which can be done using dozens of methods that differ only in the convenience of the process and do not make any difference in terms of the final result. . Device firmware changes are made more often than it seems - for example, every time you install an update released by the gadget manufacturer. Its installation takes just a few minutes and always requires a reboot of the device, after which you can continue to use it and at the same time evaluate the innovations that become visible immediately or are described before installing the version.
Why TWRP
It must be noted that manufacturers limit the capabilities of pre-installed recovery. Many experienced users want to make the most of the capabilities of the hardware components, and therefore so-called custom recoveries have appeared, available for installation on a wide range of Android devices. This solution quite seriously expands the possibilities of adding new functions to the firmware and fine-tuning devices.
One of the most popular and functional solutions among custom recovery is TeamWin Recovery (the abbreviated and commonly used abbreviation is TWRP). Below we will take a closer look at how to install TWRP Recovery on various devices using different tools and tools.
When is it necessary to restore the firmware on Android?
The main reason for the need for recovery is a violation of the rules for flashing the phone. The principles described in the list below should not be violated, but in this situation there is no need to worry - the methods described in the material will help remove the device from the “bricked” state, in which it cannot boot into normal mode. These points are strongly recommended:
- The battery charge should be at least 30%, and better – 100%. Despite the quick installation of most firmware, whether official or found on the Internet, we advise you to play it safe to save time if problems arise;
- You should not use images that are incompatible with the gadget - you can find out whether this is so in the smartphone discussion thread on the w3bsit3-dns.com forum, where active members of the community have compiled a list of recommended firmware. We also recommend asking your question in the comments under this post;
- discard old cables if the procedure is performed with the need to connect to a PC. Additionally, it is recommended to evaluate the quality of the ports themselves. They may need to be replaced.
If you do not follow these important nuances, the question of returning the previous firmware arises. The device may work normally, but if for some reason you want to return the phone to its previous state, this will not pose any difficulties due to the maximum similarity of the procedure.
Hard Reset using engineering codes and a dedicated reset button
There are special codes to reset your phone. Before entering them, I advise you to think about important files and transfer them to another drive. It is advisable to remove the flash drive, since it is unknown how this or that code works on different devices.
- *#*#7378423#*#*
- *#*#7780#*#*
- *2767*3855#
I would like to note that some firmware, for example from Samsung, do not allow the use of some engineering codes. If it doesn't work out for you, just try other methods.
The last item is a small button inside the phone that, when pressed, resets the phone to its factory state. Unfortunately, it is no longer built into modern smartphones.
If you have problems with your PC, then read about restoring factory settings on your laptop.
Ways to restore firmware on Android
Factory reset your phone
This option is divided into several types, the simplest of which is to use the Settings application. Its disadvantage is its inaccessibility if there are problems turning on the device, but if everything is normal in this regard, you should follow these steps:
- Open device settings;
- Find the “Backup and reset” section, tap on it;
- at the bottom of the screen, where the “Personal Data” section is located, click on “Reset settings”, read the warning about the process and confirm your intentions by clicking on “Ok” in the selection window.
There is also a way to go through these steps through the engineering menu, the opening code of which differs depending on the brand, and must be entered into the call panel. For example, on LG devices the combination *2767*3855# . A more universal sequence is *#*#7378423#*#* , available on most smartphones.
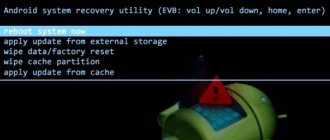
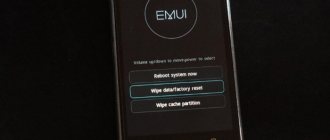
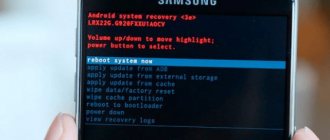
A method that works if the device cannot be turned on, or without these problems, is represented by entering recovery. To do this, you will need to hold down the volume down or up rocker (depending on the model) and the power button at the same time, and then wait for the control panel to appear. Next follow these instructions:
- Select "Wipe data/factory reset". You probably won't be able to use the touchscreen in recovery mode, so navigation will be provided by the side buttons;
- Among the mass of “No” items that serve to protect against accidental clicks, select the “Yes” option;
- Wait for the process to complete and reboot the gadget.
On gadgets from Xiaomi, the type of recovery is different and, in most cases, supports touchscreen control, which is why it deserves a separate description:
- Hold down the volume up and power keys for a long time, turn on the English version for a better understanding of how the functions work;
- Tap on “recovery” - you will see another window, the navigation of which is clear and is literally provided by three buttons;
- Click “Wipe data”, confirm your actions by tapping “Confirm”;
- As soon as a green message appears on the screen, select “Reboot to System”.
Using specialized programs (reanimators for stock firmware)
LG – LG Mobile Support Tool
Large brands create special utilities to expand the functions of smartphones, including LG, which has undeservedly lost its high share in the mobile industry. The process of using the program is extremely clear due to the presence of Russian-language localization and requires establishing a connection between the computer and the phone using a USB cable.
The sequence of actions is presented as follows:
- Download the latest version of the program from the manufacturer's website and install it on a PC running Windows. When you first start, you will be asked to install the USB driver, which will be done automatically after clicking on the “Ok” button;
- Establish a connection between your phone and computer;
- Click “Advanced features”, then click “recovery after update error”. To access it for security purposes, you must specify the IMEI of the device, which is obtained using the code *#06#, entered in the call menu. You only need to specify the first 15 digits, after which you will be able to open the section. By the way, we recommend reading the article about how to recover IMEI on Android after flashing;
- wait until the procedure is completed, after which the device will begin to operate normally.
Sony – Xperia Companion
Reflashing the device using this utility is also easy to do. The program is available for all Sony smartphones running Android. After downloading the application from the company’s website, you will need to launch it and perform the following steps:
- Click on the “Start” button in the “Support zone” card;
- Click on “Phone/tablet software update”;
- Review the information about the duration of the procedure, select “Next” in the lower right corner to go to a slide containing information about which files will be lost without the possibility of recovery if there are no previously created backup copies (for example, Google automatically synchronizes installed applications and photos taken) ;
- The utility will check the stability of the connection with the device and display information on the screen about the need to keep the charge at a level of no less than 80% (work is possible at lower values, but it’s not worth the risk). Check the box indicating that you have read these items and select “Next”;
- A list of models will appear. Choose the one that suits you best;
- Follow the steps related to the need to insert the cable after turning off the device and holding down the volume up key during the procedure;
- The installation of the official firmware over the Internet will begin. First it will download to the PC, and then to the phone itself.
As soon as information about the completion of the process appears on the screen, you can turn on the phone and take advantage of all its capabilities provided by the manufacturer.
Samsung - Odin program
The utility, suitable for Samsung devices, regularly receives new updates to ensure high speed of the process and minimal risk of errors, however, not all versions are compatible with specific devices. For models released after 2014, the latest release is suitable, for those born from 2011 to 2014 - 3.07, and even earlier products - 1.85. The interfaces of the programs differ slightly, but this does not harm performance.
Once you have Odin installed, proceed to these steps:
- Launch the program;
- In the “PDA” line, specify the path to the firmware file. It can be found in the thread dedicated to discussing the smartphone on the w3bsit3-dns.com forum. Check the checkbox on the left of this item;
- Click on the “Start” button, wait until the progress bar of one cell is filled - others will probably be empty, which is explained by the possibility of flashing several devices at the same time using this application. At the same time, PASS will appear on the screen, indicating the completion of the procedure.
If the image is divided into several files, the instructions are slightly different - you will need to point to a specific archive for each line. APBOOT should be in place of BOOTLOADER , CODE – PDA , MODEM – PHONE , CSC – in the item of the same name. If you have a PIT file, you will need to enable that too. Next, all that remains is to click on “Start”.
SP Flash Tool
The key advantage of this program is expressed in working with a lot of devices thanks to the support of chipsets from MediaTek, which are implemented in a lot of gadgets - from budget to almost flagship models. Since the utility is downloaded to a computer, for it to work you will need a USB cable that allows information to be transferred with a mobile phone.
The following steps are required:
- Upload the image by contacting brand representatives or finding it on the Internet - for example, on w3bsit3-dns.com. Extract the files, if they are in the archive, so that the path to them does not contain any characters except Latin. If the built-in Windows tools do not help, use 7-Zip or WinRAR;
- Run the program as administrator. To do this, right-click and select this item. If you need to provide a password to complete it, try to remember it or, if the computer is located somewhere outside the home, contact the company’s IT department;
- Specify where the download-agent and scatter files are located. Often the first one is called DA_SWSEC, and the second one contains the word “scatter” in the name;
- To avoid damage to NVRAM, go to the Readback tab and indicate in it the folder where its backup copy will be saved;
- Click on the “Read back” button and wait until the process is completed. This step is only responsible for the backup - the firmware has not yet been installed;
- Return to the “Download” section, click on the button of the same name, after selecting the “Firmware Upgrade” option in the drop-down menu. As soon as the flashing is completed, a window with a green check mark will appear.
Despite the apparent complexity, the program interface is intuitive, which means there is no need for a long study of the utility’s features.
Setting up the option via a personal computer
There is another option for installing TWRP - via PC. This method should be suitable for those whose devices are not in the application list. To do this, you will need an ADB driver, which can be found on the 4PDA forum. And also the TWRP application itself, which can be obtained on the official website - https://twrp.me/Devices/. Select your device from the list, click on the model from the list and find the file you need to download. It can also be taken elsewhere, for example, on the same w3bsit3-dns.com.
Procedure:
- The ADB driver must be installed in the root of the Windows system folder. Make sure that the folder name and the entire path do not contain Cyrillic characters - only Latin characters;
- You need to place the downloaded TWRP file in the same folder and rename it Recovery to avoid confusion; Install to the folder with the TWRP driver
- You also need to find a file with a .bat extension in the same folder and put the names Recovery.img at the end of the lines “fastboot boot” and “fastboot flash”;
- Next, we need to put the mobile device into Fastboot mode. To do this, turn off your smartphone, and then press and hold the Power and Volume Down buttons. These buttons may be different on your Android device. Find them out in search engines by indicating the gadget model;
- When the device goes into fastboot mode, it needs to be connected to the computer via USB;
- Then open the folder with files on the computer with which we interacted earlier and run the Install.bat file;
- If you see an identifier with the word fastboot at the top of the command line that opens, it means TWRP is connected to the device;
- Press any key as written in the window to continue;
- A new window with custom Recovery will appear on the screen of your mobile device. If the interface is in English, click the “Language” button to change it.
Below in the window there are a couple more buttons. “Swipe to Allow Modifications” - this allows you to start the recovery mode, from which you can change partitions of the device on Android, etc. If you apply it, the device will no longer be able to receive official updates automatically. In order not to disrupt the operation of the system, you can use another mode - “read only”. Or "Keep Read Only".
This is interesting: Fastboo Xiaomi - what is it.
Update via Recovery (modified third-party firmware)
All the instructions discussed below are also relevant if you are using official recovery - then you will need to flash it first, and only then the main image. This is acceptable, but not recommended - it is more logical to install the firmware directly, so further actions proceed from the position of having TWRP , CWM and Titanium Backup before the need for this process arises.
To enable this mode, hold down the power and volume down (or up) buttons for a couple of seconds. The device must be turned off, but charged!
TWRP
Team Win Recovery Project - along with the recovery described below, is one of the most popular modifications of the built-in recovery mode. Using it is distinguished by a user-friendly interface and, in particular, by the presence of touch controls that some phones lack. There is a Russian version, but the absence of complex technical terms makes it available in English.
To restore the firmware or install a new one, you will need to perform the following steps:
- Completely clear the files remaining from the previous image by going to the Wipe section and clearing the directories visible in the screenshot;
- Using your PC, move the img file to the root directory. You may need to enter recovery again;
- Tap on “Install”, select only the image. Once this step is complete, a blue “Successful” message will appear under the console. On the same screen, click “wipe cache/dalvik”, and then swipe to the right and reboot the device. In general, we recommend that you read our separate material, where we described how to install custom recovery TWRP on Android.
Option #5. Rashr
This is truly the simplest option in our review today.
All you need to do is download the program on Google Play, click on in the main menu and select the downloaded file in the window that appears.
Rice. 11. Using Rashr
Surely, one of these options will help you install TWRP. If something doesn't work out, write about it in the comments.
Modified recovery comes in several types, but the most popular are: ClockWorkMod Recovery (CWM) and Team Win Recovery Project (TWRP). Where to download and how to install the first is described in this instruction, and today we will talk about installing TWRP Recovery.
As in the case of CWM, there are several ways to install TWRP Recovery: flash it via Fastboot, connecting Android to the computer, or do everything on the device itself using special applications (much easier, but you need root rights).
Method 1. Where to download and how to install TWRP via Fastboot
We will use the most popular method of installing custom recovery (in our case TWRP) - through the Fastboot utility. It's included in the Android SDK, so go to this page, scroll down to the "Get just the command line tools" section and download the archive. You may also need ADB and Fastboot drivers for Windows.
Unzip it to the root of the “C:” drive. Go to the "tools" folder and run the "android" file.
Check only one item “Android SDK Platform-tools” and click “Install Packages”.
Select "Accept License" and then "Install".
As you can see, everything went well.
After all these steps, you will have a new “platform-tools” folder, which contains the “ADB” and “Fastboot” that we are interested in. Great, let's move on!
UPD: Next you will notice that my “platform-tools” folder is located in a different directory. The fact is that these instructions were written when the Android SDK could still be installed through the installer. Starting from version 25, the developers left only a ZIP archive for downloading. Because of this, the beginning of the article had to be edited. Therefore, the path to ADB and Fastboot will be different from mine, the rest remains unchanged.
If Bootloader is locked on your device (applies to Google Nexus, HTC, Sony, Huawei and some LG devices), you will first have to unlock it. How to do this is described in these instructions:
- Unlocking Bootloader on HTC: Method 1, Method 2
- How to Unlock Nexus Bootloader
- Unlocking Sony bootloader
1. Now go to https://twrp.me/Devices/ and select TWRP Recovery for your device.
On the next page, select "Primary (Recommended)". The download will begin.
2. Place the downloaded recovery file in the “platform-tools” folder, where “fastboot” and “adb” are located and rename it shorter. For example, I made "twrp.img".
3. Now connect your Android phone or tablet to your computer using USB. In this case, the device must be switched to fastboot mode. There are 2 ways how this can be done:
- Option one. With the device turned off, press and hold the power button + volume down until fastboot mode appears. Depending on the manufacturer of your device, this procedure may differ slightly.
- Option two. Step 1. Enable USB debugging by connecting Android to PC. Launch Command Prompt. You can find it in the Start menu. Or press the key combination “Win” + “R” and enter:
cmd
- Option two. Action 2. After this, click “OK”.
- Option two. Step 3: You will be taken to the command prompt. Now enter these commands sequentially and press “Enter” after each one.
cd/
cd path to folder with "ADB" and "Fastboot"
In my case it turned out like this:
cd Program Files (x86)Androidandroid-sdkplatform-tools
To do this, you need to copy the path in the top line of Explorer. But if you acted exactly according to the instructions, it will turn out:
cd tools_version-windowsplatform-tools
adb reboot bootloader
The last command puts Android into fastboot mode. I will explain what all these commands mean a little later in paragraph 4. It turned out like in the screenshot below.
As a result, the tablet or smartphone will reboot into fastboot mode.
4. So, let me remind you: the file with TWRP is in the “platform-tools” folder and we renamed it to “twrp.img”. Now on the command line (how to get into it is described above in paragraph 3, option 2, step 1) you need to write the path to this folder. With this command you go to the folder back:
cd/
Type "Enter" to execute it. As a result, we move from “C:UsersUser” to the “C:” drive itself, which is what we needed.
5. Use the next command to go to the folder. Since we need to get into “C:tools_r25.2.3-windowsplatform-tools”, enter:
cd tools_r25.2.3-windowsplatform-tools
And press “Enter” again. The command is completed.
6. And now enter the command that will install TWRP Recovery:
fastboot flash recovery twrp.img
“twrp.img” is the name of the downloaded TWRP file. That's why I advised you to rename it shorter, so as not to enter a long name on the command line.
7. At the end we receive this message about the successful recovery firmware.
Congratulations! You installed a modified TWRP Recovery instead of the usual one pre-installed by the manufacturer.
Method 2: Install TWRP Recovery via Rashr app
[ROOT] Rashr - Flash Tool is an incredibly useful and easy to use application. We have already installed CWM using it (link to instructions at the beginning of the article), but you can flash TWRP or Philz Recovery in the same way.
Now let's move on to the Rashr application itself and installing TWRP Recovery:
1. When you first start, a Superuser prompt will appear. Provide it.
2. Tap your finger on the “TWRP Recovery” item.
3. A list of available TWRP versions will open. Of course, it is best to install the newest one.
4. You will be prompted to download the twrp.img file. Tap on “Yes”.
5. After this, the Recovery file will begin downloading.
6. At the end, a message indicating the successful installation of TWRP will be displayed. By clicking “Yes”, you can immediately reboot into it.
In general, it is much easier to install Team Win Recovery Project through the Rashr application. To do this, it is enough to have root rights.
Method 3. TWRP Recovery via Flashify app
Another application that allows you to install CWM Recovery, TWRP, Philz or download the stock one. In addition, you can flash the kernel through it and install custom firmware. All this is available in Flashify.
1. When you launch Flashify for the first time, provide root access.
2. In the main menu, click “Recovery image”.
3. The program will ask you to select recovery. In this case, we are interested in TWRP.
4. Unlike the Rashr app, which showed TWRP 2.8.5.0 for my device, Flashify correctly found the newest version 2.8.7.0. It's best to use it.
5. The download of the file from recovery will begin.
6. Once the download is complete, the application will ask if you are sure you want to install TWRP. Click "Yup!" for confirmation.
7. At the end, a message will appear indicating the successful completion of the recovery firmware.
Click "Reboot now" to immediately put your mobile device into recovery mode.
We use the official application Official TWRP App
The TWRP developers have created a program that simplifies the download and installation of recovery. Go to the app page on Google Play and download it. Then open it, be sure to check the first 2 points, click “OK” and follow the instructions:
When you first start, you need to provide Superuser rights.
From the main menu, click "TWRP Flash".
Next, identify your device using the search.
The application will show all available TWRP versions for your model. Select the one you need.
Paid subscribers can download files directly in the program; everyone else is redirected to their website.
On the page, click “Download twrp-version.img”. The Recovery file will be downloaded to the device (by default in the “Download” folder).
Then return to the application and tap on “Select a file to flash..”.
Navigate to the downloaded .img file, mark it, then click Select.
Confirm the Recovery firmware with the “OKAY” button.
At the end you will see the message “Flash Completed Successfully!”
CWM
Recently, this recovery has lost ground relative to TWRP, but its use is still possible. The key advantages are the ability to control if the touchscreen is damaged and compatibility with older models. As in the previous case, you will need to place the image in the root of the device. You can also name it "update.zip" for easier access. Then, after entering recovery mode, do the following:
- Reset your device to factory settings by going to the Wipe Menu and then selecting “Wipe Data – Factory Reset”. Don't know how to do this? Check out the article - how to reset Android to factory settings;
- Return to the main menu, select "Install zip";
- If you gave the archive the name “update.zip”, click on “Apply /sdcard/update.zip”, otherwise click “Choose zip from SD card” and select the file - most likely it will be located at the very bottom;
- A console will appear showing the progress of the actions. The end of the procedure becomes clear thanks to the “Install from sdcard complete” message that appears;
- Reboot your device using the “reboot phone” button at the very top of the main panel.
The process is just as fast as using the method above.
Risks
Before putting into practice the knowledge of how to install TWRP Recovery, you must clearly understand all the risks associated with the procedure of installing and using custom recovery. Theoretically, using a recovery environment other than the one provided by the device manufacturer can lead to the loss of important data, as well as the device malfunctioning and even hardware failure. It is important to remember the need to save the information contained in the device until you install TWRP Recovery on Android. In any case, each action described below is performed by the user at his own peril and risk.
Titanium Backup
The main purpose of this utility is to create backup versions of applications, but one of its additional functions is firmware recovery. The application is used to fulfill the purpose specified in the text as follows:
- In the upper right corner, click on the picture of the rectangle and checkmark;
- In the menu, find the “Recovery Mode” section, next to its only item, tap on “Start”;
- Check the applications that you want to copy and proceed to this procedure, which will provide progress information for each application;
- The files will be saved in an archive called update.zip in the root of the memory. To restore it, you can use both the above-mentioned recovery and Titanium Backup itself - in the same panel, select “Restore all software with data”;
- Indicate what you need to download, then tap the checkbox. Once the process is finished, you should reboot the device.
Proper use of the program allows you not to worry about the safety of data when performing complex operations, such as flashing the firmware of a device.
(1) Recovery (custom)
In a nutshell, CWM, TWRP are alternative recovery for Android devices. Usually they are installed according to the instructions after unlocking the bootloader. They are used to install/update firmware, patches, gaps, etc.
A little banal (basics):
— Install — installation of firmware and other *.zip files (update.zip, gapps.zip, lineageos.zip, etc.)
— Wipe — data cleaning (we’ll talk more about this below)
— Backup — system backup (with the ability to select the necessary partitions), in the future, if necessary (problems), you can use this (pre-created) backup.
— Restore — the actual command responsible for restoring the system from a backup (if one was made).
— Mount USB Storage — mounts a flash drive connected via OTG. This is usually needed to connect the device to a PC directly from recovery (twrp), for example, to download other firmware, gapps and other files.
— File Manager – file manager.
— Reboot — reboot the device
Problems and solutions
Inability to transfer files
Some cables used to charge the device are incompatible in terms of working with files, so you need to use methods that do not require interaction with a computer, or simply purchase the required cable.
Lack of necessary drivers
If your USB cables support data, but you can't use them when flashing the firmware, the problem is either incompatible software or, more likely, driver issues. They need to be downloaded from the official website of the brand or processor manufacturer. Most of them have digital signatures, but if they don't, you'll need to disable authentication as follows:
- Use the Win+R key combination and enter in the window that appears bcdedit /set {default} safeboot network and press Enter, restart your PC;
- In the “Select action” tab, click on “Diagnostics”, then “Advanced options” and “Boot options”;
- Select the seventh option, then return to the operating system.
Returning to stock firmware is carried out in the same way as installing a new one, so when turning a smartphone into a “brick”, you should not panic - it is better to use any method described here, depending on your skills and the availability of certain device functionality.
Share link:
How to properly install TWRP on an Android device without a computer
In order for you to be able to use TWRP, you need to download it from the Play Market. Find it yourself by writing the application name in the search bar. Or install the utility on your smartphone using the link. To use the application you need Root rights on your mobile device. They can be obtained by installing one of the applications: KingRoot, Super SU, FramaRoot. Applications are not available on Google Play. You can find them through search engines.
Procedure:
- Install the TWRP application on your mobile device and launch;
- A new screen will display a message indicating that the application is trying to gain superuser rights (if they have already been obtained). Give him this permission;
- Click "Yes" in the next window to continue; Click the “Yes” button at the bottom of the window
- Now you need to enter the application menu. To do this, click on the button with horizontal stripes at the top of the page; Open the TWRP app menu
- Click next on the “Install TWRP” button;
- Next we need to click on “Device Name”;
- And find the name of your Android device in the list;
- After selecting the model in the previous window, you need to select “Recovery Version To Install”;
- Scroll down to the bottom and select the latest version. Then again in the previous window, click the “Install Recovery” button;
- Wait for the download to complete and click “Yes” 2 times in the window that appears. After agreeing with the last window, a reboot will begin;
- After the reboot, a window with custom TWRP Recovery will appear.
Now you have access to all the recovery functions that are described in the section above. To exit this menu, click the “Reboot” button below.


