“Why doesn’t Wi-Fi connect on my phone” is a common request from users of mobile devices with the Android operating system who are faced with this problem. In the 21st century of global technology, the smartphone has become the second computer on which you can fully work, taking into account that there is an Internet connection. But now it is almost impossible. Almost every house and apartment has a router with a wireless network. Also, you will not be left without Wi-Fi in a cafe, shopping center, public transport, and even on an airplane. This article will discuss possible no-connection errors and how to resolve them. Let's get started.
Why doesn't my smartphone connect to my Wi-Fi router?
First, determine whether this problem occurs only on your phone (Huawei, Honor, Samsung, Xiaomi, iPhone, Meizu, Asus, etc.) or whether Wi-Fi is not available on other gadgets (tablet, laptop). In the case of an isolated case, you need to look for the source in the gadget itself. If the problem occurs with all equipment - in the router settings.
Error Saved, WPA protection
Also, most people ask questions like: why doesn’t my phone see the network. This problem is quite logical. The first thing that could be, of course, is a problem in the router, or an error Saved, WPA protection, this problem is completely solvable. It occurs quite often, and mainly due to the fact that there was some failure in the router settings. And in such cases, the phone sees Wi-Fi but does not connect.
As a result, we can say that no matter what problem you have, the first thing you should do is reboot the router. Because it is quite safe, does not require a lot of time, and besides, anyone can do it. Then you can begin other actions, which will be more complex, but at the same time, you can cope with them.
Writes “Saved Protected”
There is a situation that after entering a password (or it is not needed), the network is saved, but there is no Internet connection. Most often, it is enough to reboot the router to resume operation, but sometimes you have to go into the settings of the network equipment.
- First of all, make sure you enter the Wi-Fi password correctly.
- Open the router's web interface using the information located on the equipment case.
- Look at the specified region, change if necessary to the one in which you are located.
- Set the Channel value from 1 to 10 instead of Auto.
- Change "Encryption" and "Password".
- Try different “Channel Width” options - first “Auto”, then 20 MHz, etc.
After these manipulations, find out the number of devices that are allowed to connect. O means no restrictions.
Authentication Error
The phone cannot connect to Wi-Fi due to an authentication error. In English it sounds like Authentification Error, which means you entered the password incorrectly. Authentication is required for a secure connection.
- Again, check that the password is entered correctly, if necessary, delete the network and detect it again.
- Through “Router Settings” you can change the key.
- It is possible that during initial setup, the encryption settings were specified incorrectly.
- The recommended option is to install WPA2 Personal and the AES algorithm, as in the screenshot.
- Due to neighboring networks, connection interference may occur, which requires changing the value of the “Channels” item back to “Auto”.
How to open an XLSX/XLS file on Honor and Huawei phones: methods, instructions
For all changes to take effect, reboot the router by unplugging the equipment from the outlet and plugging it back in.
Writes “Obtaining an IP address”
If there is an IP configuration error, the reason may be that the DHCP server is inactive in the router settings or the problem lies in the functioning of the Android OS.
If the failure occurred specifically in the DHCP server, restarting the router will help. If the attempt fails, follow these steps:
- Go to the “Settings” of your WiFi router.
- Check the server's enabled state.
The steps to activate the server to resolve the IP configuration error may vary depending on the network equipment model.
Wi-Fi does not activate on Android: fixing the problem
If the Wi-Fi function was working well on your device until now, and then for some reason it stopped activating, try the following steps. After each step, check to see if Wi-Fi is already working.
- Turn off your Android device and then turn it on again.
- Turn Airplane mode on and turn it off again after a few seconds. Then try to activate Wi-Fi.
- If this doesn't help, reset your Android smartphone to factory settings.
If resetting does not fix the problem, contact the device manufacturer and send the smartphone in for repair - provided it is still under warranty. Otherwise, look for an inexpensive third-party repair shop.
Authentication Error
The reason for the error that occurred during authentication was that the Wi-Fi password was entered incorrectly. Make sure that the input language is correct and you are not using Cyrillic instead of Latin. Check the correct case of letters.
If you have any questions or complaints, please let us know
Ask a Question
To eliminate the source of the problem, delete the wireless network (“Forget…”) and reboot the router.
If restarting the router and searching the network again did not help, change the password again through the router settings.
- Look for information for logging into the web interface on the device body.
- Once logged in, change your password using the Latin alphabet and numbers.
- Look at the standard - it should be WPA2-PSK.
Or select WPA, WPA2 mode if it is not supported by your smartphone. Unfortunately, while on public transport or in a shopping center, you will not be able to change the “Security Settings” of the router. Wait until you arrive home.
Writes the wrong password
If you receive this error, the first thing you need to do is check that the activation code you entered is correct. They didn’t switch the language, didn’t change the case of letters, or made a mistake in one number. If everything is correct, use the following instructions to eliminate the source of the problem.
- Check your Wi-Fi connection area.
Perhaps the router is located far away and the network does not reach the connection point, or there is an obstacle in the signal path. In this case, move the device closer.
- Make sure that the “WiFi” function is turned on, and check the “Auto-connect” checkbox if it is not there.
- Restart the router by unplugging the plug for 10-15 seconds and plugging it back in.
- Try “Delete” or “Forget” the network and connect to it again.
- Check if the RAM is overloaded due to a large number of active applications and the smartphone with Android OS needs to be rebooted.
If the stated actions are not useful, take the mobile device to a specialist in the technical department of your brand.
Network access denied
If such an error appears, check the connection of MAC filters in the router’s security settings (access control). There are white and black lists of router MAC addresses (individual serial numbers). Their availability depends on the device model.
- White - only those devices that have access to the home network are included.
- Black—addresses that are not allowed to connect are added.
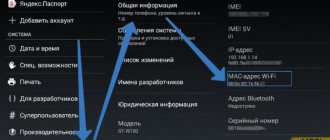
Go to your phone's Settings and find the About Phone section. Go there and click “General Information”. There you will see the line “Wi-Fi MAC address”.
Photos on Android are not saved in the gallery and memory card: reasons, what to do?
To eliminate the connection problem, deactivate the “MAC filter restriction mode” in the router interface by selecting “Disabled” from the list.
Now reboot your router and then your smartphone for the changes to take effect.
Solving a problem with a gadget that has an Android system
Even the most reliable phone systems don't always work correctly. Failures in their work occur periodically.
Correcting an incorrect Wi-Fi password
If the user sees “Invalid Authentication” on their screen, the user must re-enter the network password, as it is most likely incorrect. Owners often do not complete symbols or change their places. You'll have to disconnect and find your home network again.
Infinitely obtaining an IP address
Sometimes the reason why Wi-Fi on your phone does not connect can be a glitch in the Android system. Suddenly the phone display starts to show the line “Obtaining an IP address.” Then it is enough to reboot the faulty Samsung or other device.
Interesting! You can leave your phone on and activate airplane mode. After a few minutes it is removed and the settings are restored.
Restarting Android
The Android operating system is constantly being improved. Manufacturers are trying to improve the performance of the gadget in this way. This may cause failures and unexpected errors. To eliminate them, just restart the device by turning it off or removing the battery.
Reconfiguring an Android device
Setting up new programs on your phone may not be safe for its performance. Sometimes the reason why your phone won't connect to Wi-Fi can be due to improper installation of applications. Often they simply fill up the phone's memory, preventing it from working normally.
But there are applications that improve signal reception. For example, Wi-Fi Fixer, which can be found on Google Play. Installing it is simple. The downloaded program will start automatically.
Checking Wi-Fi functionality on Android
If Android cannot connect to the network, you just need to check all the settings and if they are correct, reboot the device to fix the problem.
Why doesn't my phone connect to WiFi, but my laptop does?
The cause of this problem, when the phone does not see Wi-Fi, may be a banal freeze of the router. That is, some functions stopped working. For example, the power supply is intermittent or the voltage is high, causing the DNCP to stop functioning. And the laptop connected because it managed to get an IP address before the router glitch.
To fix the problem, reboot the network device by unplugging it from the outlet for 5-10 minutes. Reconnect the power supply and wait for the system to boot. Try connecting to Wi-Fi from your smartphone again.
If restarting the system did not help and it was not possible to connect the phone to Wi-Fi, then a failure occurred in the gadget. Since mobile devices use regular wireless adapters, they are also prone to lag and errors. But if there are advanced settings on PC, but not on Android. All parameters were loaded into the operating system initially. In this case, rebooting the smartphone should also help.
How to distribute Wi-Fi from a laptop to a phone
A special program called Virtual Router Plus (or Virtual Router) will help you with this. It will allow you to access the Internet from your device, turning your laptop into a router. A prerequisite is that the PC must be connected to the network via a cable or using a USB modem.
You can view an article with a review of popular programs and applications for phones at the link Roscase.ru/novosti/post/71
Once the program is installed, enter the following information:
- SSID network name – give the name of the network you will distribute;
- password – enter a Wi-Fi password of at least 8 characters;
- general connection – select the type of connection through which your computer is connected to the Internet.
After entering the data, launch the virtual router. You can now connect via Wi-Fi to your network from other devices.
The smartphone does not see Wi-Fi
Users often encounter the problem of why their smartphone does not see Wi-Fi. The point here is not in the settings of the smartphone, but in the settings of the router. Carefully check all the settings again and restart both devices. If the data is entered correctly, the network should be detected.
The smartphone connects to Wi-Fi, but does not go online
The reason for the lack of Internet may be either in the Wi-Fi router or in the mobile device itself. To rule out a router, check on other equipment to see if there is a connection to the network. If there is Internet access there, then the problem is with the smartphone. If not, follow these steps to resolve the issue.
- First, try rebooting the router 2-3 times.
- Check the Internet payment for the current month and whether there is any technical work at the provider’s center (this can be done either by calling them, or connecting the cable directly to the computer).
- Make sure the wires to the device are connected correctly.
- Look at your router settings; they may have gone wrong and need to be configured again.
If the problem is still with your phone, check what color the icon is. If it is gray instead of blue, the data in the Date and Time section may be incorrect. Set the correct information. Reboot your phone.
Manually setting up Wi-Fi on Android
First, go to the Wi-Fi settings on your smartphone and turn on the adapter. Once the list of available connections appears, you have two options:
- If you need to change the configuration of an existing network due to changes in the access point settings, then simply select the desired name and hold your finger on it until an additional menu appears. Here, select “Change network configuration.”
- If you want to connect to a new connection, then scroll to the very bottom of the list and click the “Add new network” button.
Further actions will be absolutely the same for both options. The only difference is that when using the second option, you need to enter the SSID.
While in the first option the network name will already be known and the procedure will begin by entering the password (and if it has not been changed, then the field can be left blank).
So, after you have entered the SSID and security key, and also selected the appropriate encryption type, you should check the “Show advanced options” checkbox.
Next, in the “IP Settings” item, select “Static”.
This means that only the settings you specify will be used to connect to this network. Now all that remains is to enter the values in the appropriate lines:
- The IP address is the address of your device. It must fall within the range specified in the access point configuration. For example, from 192.168.0.100 to 192.168.0.199. In other words, you have 100 options in that gap. Only the last digit (100-199) changes. The range can be wider or narrower. The address itself may vary. This all depends on your router settings.
- The gateway is the main route that TCPIP uses to communicate with other nodes. Essentially, the gateway will determine whether you can access the Internet or not. If you are setting up a connection to your access point, which is connected to the Internet, then you can find out the gateway in the instructions for it. Or it will be listed on your router. If you are connecting to another network, then you should obtain such information from your provider.
- The DNS server in Wi-Fi settings on Android is a special service that determines the letter address of domain names and matches them with a digital IP address and vice versa. In other words, every time you enter the name of a site in the address bar of your browser, the DNS server calculates which address the specified value corresponds to, as well as what specific resource you need. Here you can specify two DNS - primary and secondary. If you are connecting to a router, the DNS server will be the same as the default gateway. Otherwise, check these values with your provider. It is worth noting that there are two public servers from Google:
- 8.8.8.8.
- 8.8.4.4.
These servers are open to everyone and work very stably. Therefore, you can specify them in the settings.
After that, save your changes, turn the Wi-Fi module off and on again, and try connecting to the access point.
What to do if your phone does not connect to Wi-Fi
Now let’s take a closer look at each solution to resolve the error that has occurred due to which it is impossible to connect the smartphone to the Wi-Fi router.
Removing the network
This method involves deleting network settings (IP address, DNS, etc.). The next time you connect, new settings are automatically assigned, that is, all errors should also be eliminated. Go to the wireless network selection menu and press the desired one with your finger. From the drop-down list, select “Delete this network.”
Correcting authorization data
To check that your password is correct, log into your network. To view, click next to the icon with a crossed out eye. The code will be displayed. You may not have changed the input language or letter case. To change the password, open the router interface through a browser and in the “Wireless Protection” section, enter a different authorization key.
How to recover deleted photos on Huawei and Honor phones
Checking Signal Characteristics
The signal strength can be checked using a special program. Based on the results, you will understand where to start setting up. Perhaps the Internet is not available due to the fault of the service provider.
Setting up the router
Go to the router's Wi-Fi interface. You need to change the communication channel, version and type of encryption. If necessary, make changes to the network name and password.
Time and date
Open “Settings” on your mobile device by clicking on the “gear” icon. There you will see the “System” section, and in it “Date and Time”. Make sure the information is consistent according to your region. If the network values differ, errors may occur during data transmission.
DNS problem
Press and hold the wifi network and from the window that appears, click on the “Change network” item.
In “Advanced Settings”, click on DHCP and select “Custom”. Scroll down. In DNS1 and DNS2 we enter 8.8.8 and 8.8.8.4, respectively. Confirm saving.
Proxy server on Android
Open Wi-Fi settings. Go to "Advanced Settings". Check that the value next to the “Proxy server” line is “No”. This means that it is inactive.
Uninstalling programs
Remember, you may have recently installed third-party applications on your mobile device. Review everything, and if any program seems suspicious, it is better to remove it. Some programs may block your Internet connection. Go to the application and click "Stop" to stop it. And then delete.
Reset the network, or completely reset the phone (Android)
Open the “Settings” of your smartphone and go to the “System” section. Select "Reset settings" according to the task. You can reset your WiFi, apps, or phone to factory settings.
Firmware update
Check for new updates for your router and mobile device. If there are any, update them. This may be the reason for the lack of connection.
Installing applications
Today it is possible to download an additional application through the Play Market that will help set up a wireless network. Among the recommended ones, we offer Fix WiFi, WiFi Fixer and WiFi Doctor. The programs will eliminate all problems that have arisen and increase download speed. The third program will even notify you if someone else's user connects to your network.
Virus check
To check your smartphone for viruses, download an antivirus program from an online store. For example, Dr. Web. After installation, start scanning your phone. Remove malicious files. Save important files and reset your phone to factory settings. Update your system to the latest version of Android.
Problems with wifi router
Now let's look at cases when a computer or laptop does not connect to wifi due to incorrect network settings on the signal source itself - the router
The main things you need to pay attention to in the router admin panel are:
- DHCP server
- DNS servers
- WiFi mode
- MTU
- Geography and date
If this does not help, the first step is to determine how the network is configured. It often happens that a laptop does not connect to wifi due to the fact that by default it receives network parameters in automatic mode. That is, it is assumed that the router has a DHCP server enabled, which itself distributes individual IP addresses to connected devices.
But for security purposes, it can be configured in such a way that all addresses are assigned manually - either on the laptop itself, or even registered in the network settings in the admin panel of the router itself. A symptom of this problem will be that when the computer connects to the wifi network, the screen will constantly display a message about “obtaining an IP address” without any result.
If you have access to the router, then go to its control panel (how to find out the password?) and activate the “DHCP Server” in the settings.
Another way is to try manually setting the DNS settings on the router. This is done in the admin panel, in the settings section for connecting to an Internet provider.
This is how it looks in Asus routers with new firmware - “Internet” section, “Connection” tab. Check the box to deactivate automatic selection of DNS servers and provide the following information:
- Or from Google: DNS1 - 8.8.8.8, DNS2 - 8.8.4.4
- Or from Yandex: DNS1 - 77.88.8.8, DNS2 - leave empty.
In TP-Link routers, this setting is in the “Network > WAN” section, click the “Advanced” button at the bottom of the page, check the “Use the following DNS servers” checkbox and enter the same values.
Likewise, if WiFi does not work on a laptop connected to a D-Link router (“Basic settings - WAN”)
If, after applying these settings and rebooting the router, your WiFi still does not work or your laptop does not connect to it, then let’s pay attention to two more parameters
- Wireless network operating mode. There are several common WiFi standards that differ in data transfer speed - B (up to 11 Mb/s), G (up to 56 Mb/s) and N (up to 150 Mb/s). If your router is set to the modern “N” standard, and the adapter of the connected device does not support it, then you will not be able to connect to your WiFi. If you are not sure which one is right for you, use “Mixed Mode”
- Another parameter is MTU. It is responsible for the size of a data packet transmitted over the network in one block without dividing it into smaller parts.
In the above screenshot from the TP-Link router, you can clearly see the default value - 1480. On Asus, you need to scroll down the page in the “Internet” (or WAN) section - we will see the value 1492, which was also the default.
The funny thing is that I took these pictures from routers that were alternately connected to my provider with the PPPoE connection type, that is, for the same thing, different models chose different values. Moreover, for each connection type (Dynamic or static IP, L2TP) different values are entered into their firmware. Therefore, to be sure, I would simply recommend calling your provider and finding out what specific MTU values are optimal for your Internet.
And one more setting on the router that may interfere with the adequate operation of Wi-Fi - country, time and date. It would seem like a small thing, but under certain conditions it may also cause wifi to not work on a laptop.
None of the above helped
If after these steps you cannot connect your smartphone to the Wi-Fi router, the problem is with the gadget. Reset it to original settings:
- go to the “System” section;
- select “Reset settings”;
Due to the fact that system files may have been damaged, a global reset is required. After the phone reboots, update to the latest version of Android - “System” > “System Update”.
In our material, we outlined possible errors when connecting to a Wi-Fi network and how to eliminate them. We hope you were able to use the information posted and were able to connect to the Internet without any problems.
Benefits of connecting via Wi-Fi
The Internet via a Wi-Fi connection is considered unlimited in terms of the amount of information transmitted over the network. This is due to the fact that the router transmits stationary traffic, which in Russia is given mostly unlimited. Besides the fact that there is no limit, another important factor in this transfer was the connection speed.
If we compare the performance with mobile traffic, then with Wi-Fi transmission the speed is much higher. This allows you to download movies in good quality and play on the Internet without freezing on your tablet.
