Pinch and long press in Google Photos for easy photo management
Gestures in Google Photos make using your smartphone much easier. For example, you can quickly change the image display format with a pinch, without even going to the additional menu. Just pinch and spread two fingers over the list of photos, and the application will switch the view: normal, by day, by month, by year.
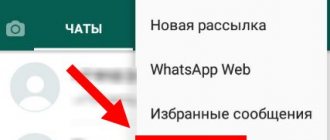
Plus, you can quickly select multiple images. To do this, hold your touch on one of the desired pictures and, without lifting your finger from the screen, move it over the others.
List of control gestures in Android 10
Despite the fact that Android 11 has already been released, most smartphones are still running the tenth version. And the list of gestures has not changed much, so there is not much difference and we will consider Android 10 gestures.
- The first gesture that will come in handy is Home. It works as follows: you need to swipe up from the bottom of the screen. This will take you back to the main desktop. This can be done from any program
- If you want to take a step back, you need to swipe along the left or right edge of the screen;
- To switch from the currently active application to the one that was turned on previously, you need to swipe up and hold it, and then slide your finger left or right. This makes switching between all open applications much easier;
- To open a list of all open applications, after swiping up, you need to tap on the display;
- To access Google Assistant, you need to swipe down on the bottom left or right corner.
It's not difficult to get used to the control gestures. All it takes is practice. While many users prefer this navigation option, others find the standard ones more comfortable. Fortunately, you can switch between them as much as you like, so no one is stopping you from experimenting and then returning to the method that has already been proven over the years if the new one does not please you.
Instantly go to the quick settings menu
Android's quick settings menu is perhaps the easiest way to do anything on your phone, such as switching Wi-Fi or Bluetooth, turning off automatic screen rotation, and a bunch of other options.
Seriously, try it. Swipe two fingers from the notification panel to immediately open the Quick Settings panel. A good thing.
Gesture Control: Edge to Edge. Part 1
Hi all. A translation of an interesting article has been prepared especially for students of an advanced course in Android development.
This is the first article in their Gesture Control series.
You can find other articles at the link. Android Q has added a new system navigation mode that allows the user to return to the previous screen, go to the home screen and launch the assistant using gestures.
Demonstration of new gestures in Android Q
With the transition to the gesture system control model, applications received more screen space. This allowed apps to provide more immersive user experiences.
On most devices, users can choose the navigation mode they want. The existing three-button navigation mode (consisting of back, home, recents buttons) remains, however. This measure is required for all devices version Q and higher.
You can read more about the research and solutions that went into the gesture control concept in this article from Android System UI Product Managers.
This article is the first in a short series that focuses on how developers can enable gesture control in their apps. In the series we will cover the following topics:
- Edge to Edge: Let your app fill the entire screen.
- Handling visual occlusions of the system user interface.
- Handling conflicts between application gestures and system gestures.
- Common scenarios and how to support them.
Let's start with how apps can be laid out from edge to edge of the screen.
From edge to edge
I use the term edge-to-edge to describe apps that can be expanded to fill the entire screen for a more immersive experience.
By default, applications are located below the status bar and above the navigation bar (together called system bars). With an edge-to-edge layout, apps extend beyond the system panels. This will allow your app's content to be front and center to create a good user experience.
In practice, this means that the app creator must keep two things in mind:
Using the Navigation Pane
The first and most important consideration for gesture control support is handling the layout behind the navigation bar.
As the navigation bar has been reduced in size and prominence, it is highly recommended that apps can be placed behind the navigation bar when running Android Q+ to create a more compelling and modern UX. When running on devices running Android Pie and below, placement behind the navigation bar is considered optional, leaving it up to the app creator to decide if it makes sense. However, almost all of the required APIs are backwards compatible to API 21 (or AndroidX will handle the differences on its own), so the amount of additional work required to support pre-Q devices is minimal. Users on pre-Gen Q devices can also get an immersive experience. Only minimizing the required work and testing is considered optional.
Using the status bar area
Secondly, you pay attention to the top part of the screen - the status bar. Now it makes sense to use status bar areas if your content or layout requires it. What do we mean by this? An example of a layout that could take over the status bar is a widescreen image. For developers, this means using something like an AppBarLayout
that sits and docks at the top of the screen.
Example of an application with a full-width image on the status bar
On the other hand, if the user interface consists of a list of elements with a fixed Toolbar position at the top, there may be no point in using a status bar area. The same rules apply to the navigation bar: it's completely optional to use them on pre-Android Q devices.
Implementation
There are three key steps in implementing the use of edge-to-edge regions.
- Request to display in full screen mode
The first step is to tell the system that our application should be placed on top of the system panels (along the Y axis). The API we use for this is setSystemUiVisibility() on the view with a few flags. The flags that interest us look like this: view.systemUiVisibility = // Tells the system that the window wishes the content to // be laid out at the most extreme scenario. See the docs for // more information on the specifics View.SYSTEM_UI_FLAG_LAYOUT_STABLE or // Tells the system that the window wishes the content to // be laid out as if the navigation bar was hidden View.SYSTEM_UI_FLAG_LAYOUT_HIDE_NAVIGATION After this, our views will be located in full screen mode on the navigation bar.
Now our application will be located in full screen mode on the navigation bar
- Changing System Bar Colors
Since our application is now in full screen mode, we need to change the colors of the system bar so that we can see the content that is behind it.
Android Q
When running on Android Q, our only goal is to make the system bar transparent.
@android:color/transparent @android:color/transparent In Android Q, the system is now responsible for handling all visual protection of system bar contents (time, icons, drag-and-drop handling, etc.) in all navigation modes. This means we don't have to think about it anymore. In practice, this means that the system will do one of two things:
Dynamic color adaptation
The contents of the system bar change color depending on the content behind it. Thus, if the panel is located above some light content, its color will change to dark. Conversely, the color will change to light if the content is dark. This is what we call dynamic color adaptation.
Dynamic color adaptation in Android Q
Translucent mesh
Alternatively, the system can use a translucent mesh (scrim) behind the system panels. Note that this only works if you have declared targetSdkVersion 29 in your application. If your app targets SDK 28 or lower, the grid will not automatically appear and you will be left with a transparent navigation bar.
System-provided grid in control mode on Android Q
Both of these actions are performed so that the user can always see the contents of the system tray. The option the system chooses depends on several factors. The grid will be used if:
- One of the button modes is enabled (2- or 3-button);
- In the gesture control mode, the manufacturer himself decided to disable dynamic color adaptation. A possible cause may be that the device is not powerful enough to handle color adaptation.
An example of how the screen can be used with gesture control.
In all other cases, dynamic color adaptation will be used. The reasons listed are relevant only at this point in time; everything may change in the future.
Disabling system bar protection in Q
If you do not want the system to automatically protect content, you can disable this option by setting android:enforceNavigationBarContrast and/or android:enforceStatusBarContrast to false.
Android Pie and below
If you decide to move to an edge-to-edge concept and on pre-Q devices, you'll need to set system bar colors to semi-transparent to use content protection. A black mesh with 70% opacity would be a good step for creating a theme with dark system panels.
#B3FFFFFF #B3000000 You may need to adjust the transparency of the top and bottom bars, depending on the content behind them. For light themes, you can set a light translucent color (for example, #B3FFFFFF).
Example showing both grids in dark and light themes
- Visual conflicts
After completing these steps, you may have noticed that some of your views are now located behind system panels.
Our third and final step is to handle any visual overlays, which we'll talk about in future articles. That's all. We invite all readers to a practical webinar on Android UI Testing.