What to do if Google Installer doesn't work?
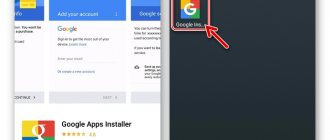
If Google Apps Installer does not install services and does not work, use the methods described in detail below.
How to check the warranty and authenticity of a Huawei or Honor phone using Imei
Reset system settings to factory defaults
The problem can be solved after returning the gadget to the settings that were when it was purchased.
- Open Settings, go to Backup & Reset.
- In the window that appears, run the desired procedure.
- Click "Erase everything."
- Install Play Market.
The procedure deletes personal data, so it is advisable to save it to another source in advance.
Non-standard installation of Google services
If the Play Market has not been restored, go the original route. Since some gadgets do not have GApps, use Mobile Go as the installer. Follow the instructions.
- Download to your personal computer or laptop.
- Write the name in the search bar and download “Google Play.apk” and “Google Service Framework.apk”.
- Take your mobile phone, activate USB debugging.
- Connect the gadget to your computer;
- Go to File, open internal memory, find system.
- Go to App, copy APK files, click on “Add”;
Keep in mind that while the file is downloading, you must ensure that the device is not disconnected from the electrical system. Disconnect the gadget from the PC and restart. After completing the steps, the data package will work as usual.
Cleaning your Android device from residual files
If you bought an Android gadget that was previously used by another person, then perhaps the Play Market was already installed, but incorrectly. To check these guesses, check the residual files in the data folder. But keep in mind that you will need root rights. To eliminate residual files, follow these steps:
- activate extended access to root rights;
- download Root Explorer;
- using two data folders;
The first is on the external storage, the second is on the internal. Delete files that have Play Market and Google in their names. Then link to your personal Google account and download the application. If no lags are found during these actions, then the breakdown is eliminated. In other cases, you need to move on to the next solution steps.
If you have any questions or complaints, please let us know
Ask a Question
How to increase screen lock time on Huawei/Honor
Installation from third party sources
The problem can be solved after downloading the APK file and installing it. After downloading to your PC, copy it to another device using USB or Bluetooth. But if there are restrictions, then you will not be able to activate the program. You need to do the following:
- open the “Settings” of your Android smartphone;
- go to “Security” or “Applications”;
- open "Unknown sources".
The file runs without errors. Agree with the points that the system suggests, wait until the process is completed. If completed successfully, you will see a Google Services shortcut.
Cleaning up the Google services program
If there are problems, clear the Google service. To do this, go to “Settings” / “Applications” / “Stop” / “Manage space” / “Delete all data”.
These functions will delete the information. For further successful work with it, create a new Google account. After which you can restore your deleted personal information.
Install via Recovery
It is important to be very careful when performing installation through this function. Pay attention to the OS version, since the GApps Store is released individually for each version. To clarify this information, open the “About phone” menu. Saving important files can be done through a backup copy.
- Install custom recovery.
- Download the GApp archive for your OS.
- Save the archive with the servers.
- Reboot your gadget.
The combination is determined by the gadget model, but most often you need to simultaneously hold down the volume and power buttons. Select “Install zip from SD Card”, specify the path to GApps. Wait while the system finishes installation. The method is somewhat complicated, but it almost always works. Using these recommendations, configure the correct operation of Google Apps Installer.
Problem with Google servers
If Google Play does not work normally, then you need to check whether other applications are being downloaded. It is quite possible that the update server is temporarily down or is simply overloaded. But the user will not be able to fix this problem - he will have to wait and try again to download the program or update it later.
The problem with downloading applications may be due to an outdated version of the Google Play Store
Google Chrome won't install on my computer
There are a huge number of reasons why problems arise during the installation of Google Chrome on a PC - the most common of them will be discussed.
Reason 1: Traces of the previous version
Before reinstalling the Google browser on Windows, you need to make sure that all the “tails” from the old version have been successfully removed - their presence may prevent the updated Chrome from being installed successfully.
You can check for old files after standard Chrome removal using the following algorithm:
- Apply the combination of Win + R buttons, and in the utility that opens, enter the command “regedit", click on "OK" or on Enter.
- In the Windows system registry window that opens, press the key combination Ctrl+F and insert the query “chrome", activate all search options and click on "Find Next".
- Manually delete all detected entries related to Chrome (right-click - "Delete").
After completing these steps, you can try installing the latest release of Google Chrome again.
Delete only entries associated with the browser - clearing other settings may lead to system errors.
Reason 2: Viral activity
Viruses may well interfere with the normal installation of Google Chrome. If you do not have any anti-virus software installed on your computer, and there is no certainty that no malicious objects could have entered the system, it is worth conducting a deep scan with any free tool.
Dr.Web CureIt could be one of these – it is distributed freely and can be downloaded by clicking the button below. Before downloading, you must agree to the terms of the license agreement and give permission to send statistics. Additionally, you will have to indicate your first and last name, as well as the email address to which the distribution package will be sent.
Download Dr.Web CureIt!
If viruses are detected, they need to be removed - then you can restart the system and try to install the browser.
Reason 3: Lack of free space
By default, Google Chrome is necessarily located in the system partition, which can be extremely small in volume. You can find out the amount of free space through Explorer - at least several gigabytes should be available on drive C.
You can free up space using specialized utilities for deleting temporary files (for example, CCleaner ) or manually uninstalling unnecessary software, as well as cleaning the desktop (everything that is on it is placed on the hard drive).
Download CCleaner
You should take care of preparing the disk in advance, since you cannot change the browser installation directory.
Reason 4: Wrong bit depth
When you download Google Chrome from the official website, the service independently determines the system bit depth and loads the appropriate distribution. Sometimes he makes a mistake, and therefore the required version is not downloaded from the official website - problems arise with further installation.
The issue can be resolved as follows:
- Expand the context menu for the item "This computer" V "Explorer", go to "Properties".
- Check the OS bit depth in the appropriate section (either 32-bit or 64-bit).
- Go to the official Google Chrome download page, go to the end, expand the section "Products" and select an option "For other platforms".
- Select Windows with the appropriate bit depth from the list provided, download the distribution, try installing the browser (if it was not installed in Windows 7/10).
If your PC is using Windows XP or Vista, you should select these options - the service will notify you that support will not continue, but will allow you to download the latest available version.
Reason 5: No administrator rights
Sometimes the reason is simple - the installer is launched without administrator rights. To fix this, just right-click on the executable file and select "Run as administrator" .
Reason 6: Firewall operation
During the installation process, the installer may indicate that the computer is not connected to the Internet, and due to this error, Google Chrome could not be downloaded. If everything is fine with the connection, then the system or third-party firewall is blocking the download.
To temporarily disable Windows Firewall, follow the instructions below:
- Right click on menu "Start", go to "Control Panel", select directory "Administration".
- Find a shortcut in the suggested list "Services", run it.
- Sort services by name, find an option "Windows Firewall", open its contents.
- In the column "Startup type" set an option "Disabled", apply the changes and restart the PC.
After successfully installing the browser, the firewall can be turned back on - this will not entail any negative consequences.
Reason 7: Files are missing
Sometimes, when installing Chrome, it indicates that it cannot find the files necessary to complete the procedure. In this case, we are not talking about browser components - there is no system data.
To correct the error, press the Win + R key combination, insert and execute the command “ cmd sfc.exe /scannow in the command line that opens and press Enter. Allow the utility to analyze the integrity of system files and restore missing ones.
After the utility finishes working, the system must be rebooted.
S mode activated
Activating the mode may be the reason why chrome is not installed on Windows 10. S-mode prioritizes the security of the device, and therefore blocks the installation of most programs. To understand whether S Mode is active on your computer, just go to system properties using the button combination – Win + Pause Break.
To disable:
- open Windows OS settings;
- go to the “Update and Security” section;
- in the “Activation” section you can see the OS version installed on the PC. Here you can also find a link that will allow you to switch OS versions. To do this, you will need to switch to a virtual store;
- link field, click on the “GET” button. The procedure will take about one minute. After its completion, you need to go to system properties to check the changes.
After disabling the mode, you can proceed to downloading any software products.
Error "Installation failed"
This error has a number of solutions:
- checking the device with the ADWCLEANER scanning and cleaning program. In the settings you need to activate the group policy reset option;
- Clear OS group policies yourself. Log in with administrator rights and enter the commands in sequence.
How to disable AdBlock in Google Chrome


