Has your microphone stopped working? It's not a common problem, but it's not particularly rare either. There are many reasons why this happened, and a banal breakdown requiring equipment replacement is just one of them. Sometimes things can be much simpler. The article will look at options for why the microphone stopped working on a laptop or computer, what can be done about it, and in the most tragic case, how the microphone is repaired.
Microphone not included
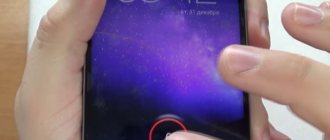
Oddly enough, absent-mindedness is sometimes the cause of many troubles. So, the microphone may be in perfect condition and ready to work, but simply not be turned on.
How to check if this is not true and that the microphone has stopped working due to the forgetfulness of the owner of all the equipment? To do this, you need to go to the “Recording devices” tab (it can be found in the menu that appears if you right-click on the speaker image in the panel at the bottom of the screen), and the PC itself will display on the display all available microphones for recording and their current status.
The same can be checked in the “Device Manager” (you can find it by searching for “Windows”).
No. 4 Roll back drivers
If the situation is the opposite, and problems appeared after the update due to the installation of crooked drivers by the system, then this problem can be solved. There is a rollback for that.
The instructions for returning the old version of the driver are as follows:
Right -click the “Start” (1) and select “Device Manager” (2).
2 Next, look for the microphone again and right-click on it. But now select “Properties” in the context menu.
3 And in the next window you just need to click on the “Roll Back” button.
The operating system will do the rest itself.
At the end of the process, it will display a message indicating that you need to restart the machine. And it's better to do it. If the problem was with the new drivers, then after a rollback the microphone should definitely work.
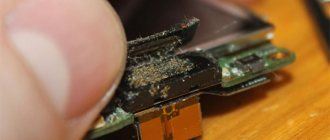
If none of the above helped you, then there is a high probability that the microphone itself has died. Or the socket where it was usually connected has failed. Be that as it may, in this case the problem is hardware in nature.
Conclusion
So, above we looked at the question of what to do if the microphone does not work on a computer or laptop. There are several ways to solve the problem. And usually they help. Unless the problem is hardware in nature.
VIDEO: Microphone is detected, but does not work (Windows 10) SOLUTION
Driver problem
Also, the microphone may stop working if the drivers for it are installed incorrectly, are outdated, or do not exist at all. You can check this manually in Device Manager. But a microphone program can also help with this; it will automatically find the necessary executables on the Internet and install them on the PC.
There is another advantage to using it. A microphone program (correctly chosen, of course) can diagnose the condition of recording devices, identify problems and give advice on how to fix them.
What to do if the microphone is hard to hear
Any micro, external and built-in, is exposed to the environment. First of all, it's dust. The very thin membrane of the voice device is covered with a foam cap and a decorative grille. During operation, dust that gets inside sticks and clogs the pores of the cap and after some time this will have a strong negative impact on the sound quality. What to do if the microphone does not work well. In this case, thorough but gentle cleaning can help. Desktops use external microphones, in which the protective metal mesh is easily unscrewed along the thread and the protective cap is removed.
Next, you need to pour warm water into a small container, add a mild detergent there and hold the windproof cap there for 15-20 minutes. Then squeeze out the dirty water and repeat the procedure 2-4 times. The metal grill just needs to be washed. Nickel plating prevents rust. The capsule membrane should not be touched. If there is dust on it, it needs to be blown off with a stream of air from a rubber bulb. The voice device should be assembled after all parts are completely dry.
Weak microphone
How will the user know that the microphone has stopped working? You can't hear him on the recording. But there is an option that the performance is not impaired, the signal is simply insufficient and the voice (or any other sound) is ultimately not perceived by the device and, as a result, is not reproduced. This problem can be solved using the “Microphone Gain” option in the settings of this equipment. You will need to check the box next to the function.
Causes of microphone problems
After purchasing a new microphone and connecting it to your computer, you may find that for some reason it does not work. Of course, you might think that the microphone is broken.
However, in fact, the reason may not lie in the microphone at all, but in your operating system. This is where the first reason comes from.
Microphone is disabled in Windows settings
To solve this problem, first check to see if you have connected the microphone correctly.
If you see that the microphone plug is not connected to the corresponding jack (usually pink), then reconnect your microphone. Your system unit may have several pink connectors. You can try connecting a microphone to each separate connector.
If this does not help, check the operation of the device via sound recording. Type the name of the “Sound Recorder” utility in the search for Windows 8 or find this utility through Start in the Standard Programs (Entertainment) directory for Windows 7 and Windows XP.
In the case of Win XP, you need to click on the Options tab in the window that opens and select Recording. In the new window, look at the box where the volume controls are shown. If a microphone is not selected, check the box next to it. You will now be able to see your microphone settings. You will need to move the slider up if necessary. If you are using newer versions, then you need to open the menu on the taskbar, which has a speaker icon. Right-click on this icon and select "Recorder". The system will automatically take you to the recording devices directory. Among them you can find your microphone. Double-click it and click the Properties button. In the window that opens, in the General tab, select Use this device.
If you do not have a microphone in the list of recording devices, then you need to open the driver settings and select the microphone jack. To do this, right-click on the volume icon again, open the volume mixer, go to the Levels tab. There you can adjust the sensitivity of your microphone.
- Download 14.9Mb (SoundMax sound driver for Windows 7 and 8 for 32 and 64 bit)
- Download 48.7Mb (Realtek sound driver for Windows 7 and 8 32bit)
- Download 52.9Mb (Realtek sound driver for Windows 7 and 8 64bit)
Please note that when talking about microphone settings, it is important to take into account your sound card. It can be compatible with different drivers, namely Soundmax or Realtek. Therefore, when downloading drivers, be sure to make sure that you download them specifically for your sound card. You can check which drivers your sound card supports through the taskbar in the volume mixer.
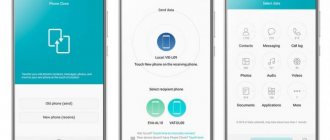
A special case of this problem may be a microphone failure in Skype. To resolve this problem, you need to go to “Settings”, select “Privacy” and “Microphone”. Next you will see a list of applications. Among them should be your microphone. Check if it is enabled; if not, move the slider to the Enable position.
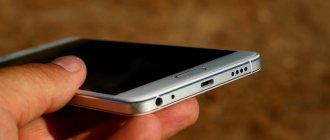
Line input failure (for externally connected recording devices)
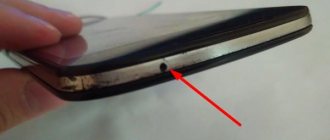
If an externally connected microphone stops working, the problem may not be with it, but with the line input. It’s very easy to check: firstly, try using the “native” recording device of the PC, and secondly, you can connect an external microphone to another device (any other laptop, tablet, smartphone, computer, etc.). If there is a problem with the linear input, well, you will have to take it in for repair.
Microphone stopped working after Windows 10 update or reinstallation
After the recent major update to Windows 10, many encountered this problem. Likewise, the microphone may stop working after a clean installation of the latest version of the system.
How to fix BIOS LEGACY BOOT OF UEFI-ONLY MEDIA error when loading Windows from a USB flash drive
The reason for this (often, but not always, the methods described below may be required) is the new OS privacy settings, which allow you to configure access to the microphone of various programs.
So, if you have the latest version of Windows 10, before attempting the methods in the following sections of the guide, try these simple steps:
- Open Settings (Win+I keys or through the Start menu) - Privacy.
- On the left, select Microphone.
- Make sure microphone access is enabled. Otherwise, click “Change” and enable access, also enable access for applications to the microphone just below.
- Even lower on the same settings page, in the “Select applications that can access the microphone” section, make sure that access is enabled for those applications where you plan to use it (if the program is not in the list, everything is fine).
- Here, enable access for the Win32WebViewHost application.
Replacing the touchscreen and touch glass on your phone
You can then check if the problem has been resolved. If not, we try to use the following methods to correct the situation.
Checking the microphone for functionality
So, if the user is actively searching for the reason why the microphone stopped working, he will be forced to constantly check it. Standard Windows capabilities (any version) allow you to do this in real time.
You just need to go to the “Recording devices” tab (how to do this was already written in the same article a little earlier), select the appropriate one and find the “Listen” option in the parameters. Place a checkmark next to it. Done - now all sounds received by the microphone will be simultaneously output to the PC speakers.
There you can also find other configurations of the recording device: experiment with microphone gain, noise reduction and everything else.
Diagnosis of the problem
Sometimes this method helps solve the problem at the initial stage.
So let's get started:
- Find the Start menu in the lower left corner and press the button.
- In the dialog box, select “Control Panel”.
- Then find the “System and Security” option and click on it.
- In the “Troubleshooting” tab, click “Troubleshoot audio recording problems.”
- Next, we follow the system manual and if an error is found, we correct it and restart the PC.
If this did happen
It is possible that there is another reason why the microphone stopped working, which was already mentioned at the very beginning. If it's broken, that's also possible.
The likelihood increases if:
- the microphone did not stop working suddenly, there were prerequisites for this;
- the device has been dropped or otherwise subjected to physical impact;
- the microphone does not work in all cases in which it can be used, and not just in one service (such as Skype, RedCall or a regular voice recorder).
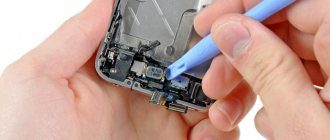
In this case, the microphone (if it comes separately from the PC) or the entire laptop will have to be taken to a service center, where they can provide professional assistance.
Microphone repair can be quick or lengthy (depending on the severity of the damage). The price also varies widely depending on which recording device needs to be repaired and why it broke.
Microphone not working on Skype
There is another unpleasant reason for a microphone malfunction. Problems at the program level. Why doesn't the microphone work on Skype? If it is detected normally in the system, but does not work in Skype. There are two options:
- the microphone does not work at all;
- or it works, but with strong noise.
If Skype does not see your microphone, go to control panel -> sound -> recording. This window displays all available input devices. Finding the active one is quite simple: next to each device there is a scale showing the signal level, and the microphone that is active shows a certain level, while the rest remain static. Remember the device name and go to Skype settings. We need the “Sound Settings” tab, or rather the “Microphone” item. From the drop-down list, select the device whose name you remembered in the previous paragraph. Check with Echo Sound Test. Still haven't heard? Then go back to the “Recording” option in the control panel, double-click on the active microphone, go to the “Levels” tab and raise the microphone volume and gain. Repeat until the microphone is at full volume.
If Skype sees the microphone normally, but the noise does not allow you to make out a word, the whole problem lies in the fact that the volume and/or gain of the microphone is too high.
In this case, we do the opposite - we lower the indicators until we reach optimal values. This completes the microphone setup in Skype. By the way, other VoIP clients that work on a similar principle can be configured in a similar way.